
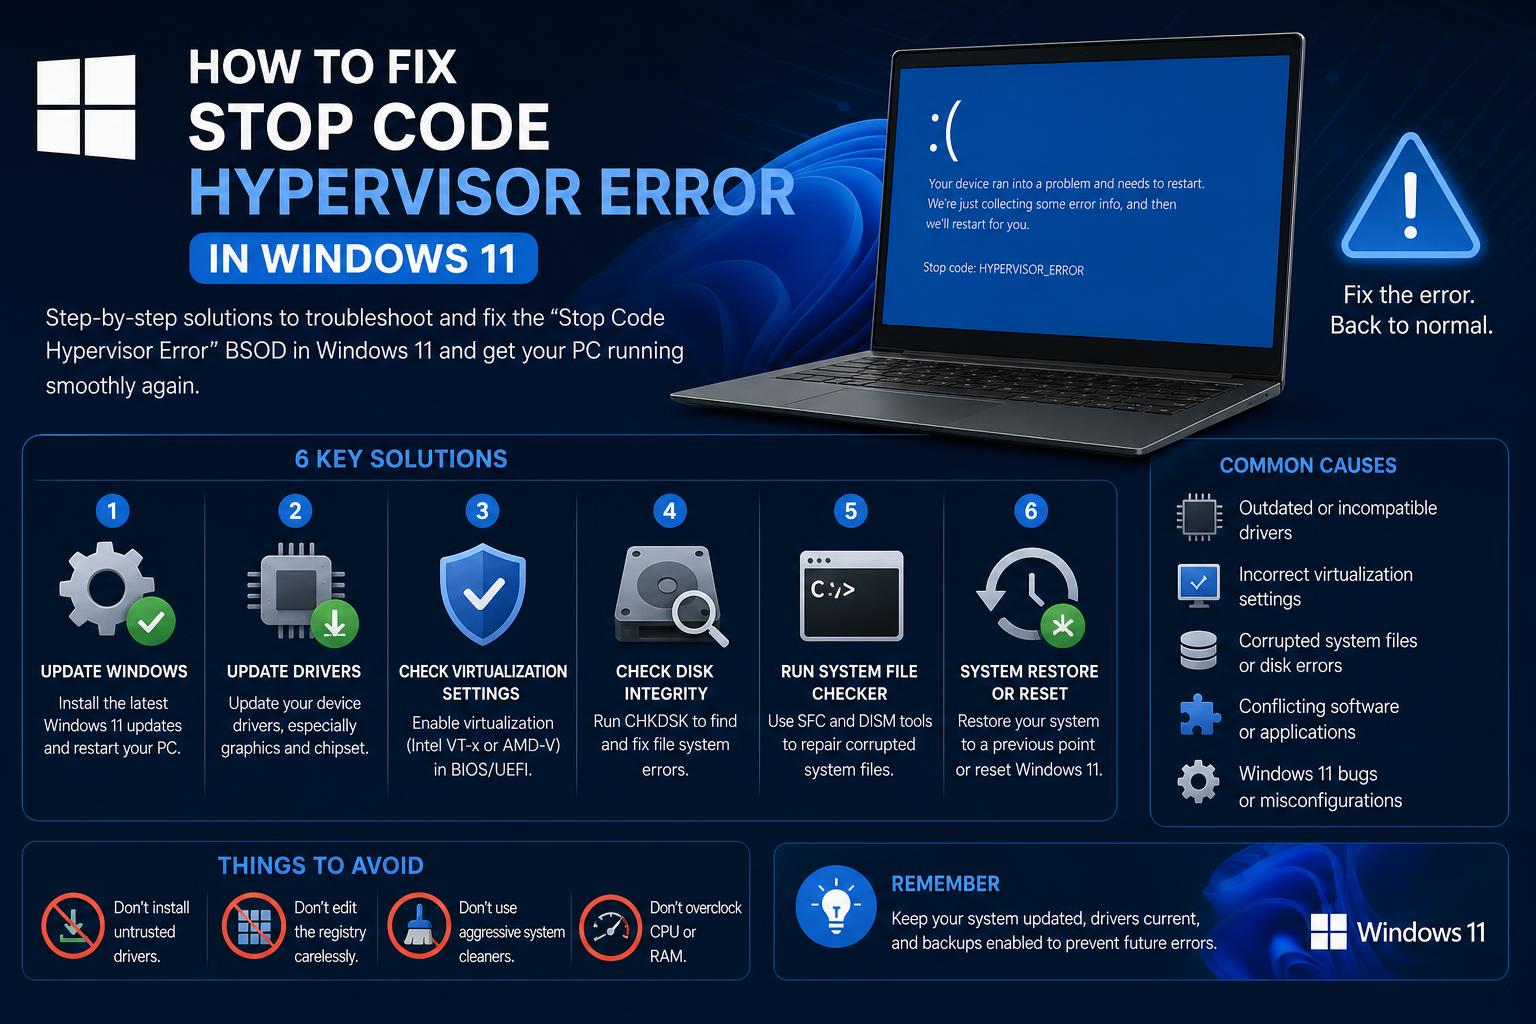
- HYPERVISOR_ERROR is often linked to virtualization, hardware faults, or driver issues.
- Resolving the problem requires a mix of driver updates, BIOS checks, and memory tests.
- Windows updates may cause new compatibility problems, so watch for hotfixes and firmware changes.
- Persistent issues often point to actual hardware defects, especially in the CPU or RAM.
When your Windows 11 machine suddenly crashes and flashes that ominous blue screen displaying the ‘HYPERVISOR_ERROR’ stop code, it’s not just frustrating—it can actually halt your entire workflow and leave you wondering what’s gone wrong. This particular Blue Screen of Death (BSOD) error often shows up unexpectedly, whether you’re gaming, developing software, or simply browsing the web. For many, pinpointing the cause feels like diving into a rabbit hole. This guide brings together the latest real-world problem reports, expert troubleshooting steps, and technical insights—so you don’t have to sift through scattered forum threads or piecemeal advice.
Let’s take an in-depth look at what causes the Hypervisor Error in Windows 11, why it appears after certain hardware or software changes (like Windows Updates), and exactly what you can do to resolve it. Practical, reliable solutions are based strictly on reported cases, relevant technical backgrounds, and hands-on troubleshooting—giving you the confidence to approach this BSOD like a pro. Ready to dig in?
What is the Hypervisor Error Stop Code?
The ‘Hypervisor Error’, also known as HYPERVISOR_ERROR or the bugcheck code 0x00020001, is a critical system crash tied directly to virtualization technology on your motherboard or CPU. In Windows 11 and Windows 10, virtualization features are increasingly used for features like Hyper-V, the Windows Sandbox, Windows Subsystem for Linux, and security mechanisms like Credential Guard. If something interferes with the hypervisor layer (software or hardware), your system can crash with this specific stop code.
The error isn’t limited solely to people running virtual machines—certain security and compatibility settings, outdated drivers, or hardware failures (especially memory or CPU issues) can all trigger it. Affected users have reported issues while trying to start VMs in VMware Workstation, after Windows updates, or even just during regular use with no virtualization software running.
Common Scenarios and User Reports
- Repeated BSODs: Many individuals have seen ‘random’ blue screens, often after recent hardware changes (new CPUs, RAM upgrades) or after major Windows updates.
- Specific VM Crashes: Some report that only one virtual machine consistently crashes the host, while others function perfectly. This points towards configuration or compatibility issues at the hardware or firmware level.
- Hardware and Driver Complications: Troubles point towards hardware-level problems (like ‘WHEA’ errors for memory or CPU), but can also involve outdated or corrupted graphics drivers—especially with AMD processors (as flagged by system files like amdppm.sys). Para evitar estos fallos, también puede ser útil revisar la integridad del sistema de archivos o realizar verificaciones de hardware.
- No VM Involvement: Occasionally, crashes occur even when no virtualization platform is installed, instead pointing at deeper system instability.
Root Causes Behind the Hypervisor Error
Based on the consolidated troubleshooting and error logs, several common causes emerge:
- Processor or Memory Hardware Failures: A sizable number of users report that faulty CPUs (even new, seemingly functional ones) or defective RAM modules can cause hypervisor errors. Some trace it back to ‘Machine Check Exception’ events indicating hardware defects. Además, problemas con la memoria RAM pueden ser detectados mediante utilidades específicas de diagnóstico.
- Driver Issues, Especially AMD: Conflicts or bugs in AMD GPU or CPU drivers frecuentemente aparecen en logs de BSOD. Malas actualizaciones, eliminación incorrecta de controladores o restos de controladores antiguos pueden conducir a fallos persistentes (especialmente cuando amdppm.sys está involucrado). Para solucionar esto, una revisión y actualización de los drivers puede ser necesaria.
- Windows Updates: Major updates ocasionalmente introducen bugs o incompatibilidades —en particular con funciones de virtualización habilitadas o nuevos módulos del kernel. Desde este enlace puedes consultar cómo solucionar errores relacionados: Cómo solucionar errores de código de parada en Windows 11.
- Firmware or BIOS Settings: Configuraciones incorrectas en BIOS—como desactivar extensiones de virtualización (Intel VT-x o AMD-V), Secure Boot o tener BIOS desactualizado—pueden impedir el funcionamiento correcto del hypervisor o causar inestabilidad.
- Virtual Machine Settings: En entornos profesionales y de desarrollo, configuraciones específicas de VM (como firmware UEFI, Secure Boot, virtualización anidada) pueden desestabilizar el sistema anfitrión, especialmente tras cambios o actualizaciones. Para gestionar estas configuraciones, revisa la documentación de VMware o Hyper-V.
Step-by-Step Troubleshooting for HYPERVISOR_ERROR
The following comprehensive troubleshooting steps incorporate community fixes, Microsoft support advice, and hardware diagnostics:
1. Check and Update Your Drivers
Outdated or corrupt drivers—especially those related to virtualization or AMD hardware—can destabilize your system. Ensure all drivers are current:
- For AMD GPUs, completely uninstall the current driver using tools like AMD Cleanup Utility or DDU (Display Driver Uninstaller). Find detailed uninstall instructions at the official AMD knowledge base.
- Reinstall the latest driver from AMD’s support site: AMD Radeon Auto-Detect Tool.
- Update chipset and CPU-specific drivers from your motherboard or system manufacturer.
2. Confirm BIOS Virtualization Settings
Modern CPUs require Intel VT-x (for Intel processors) or AMD-V (for AMD processors) enabled in the BIOS. Without this, virtualization won’t function correctly. Follow these steps:
- Restart and enter BIOS/UEFI (usually by pressing Del, F2, or Esc at startup).
- Navigate to the Advanced options and verify Virtualization Technology is enabled.
- If your system uses Secure Boot or UEFI firmware for VMs, ensure these are configured correctly.
- Update your BIOS to the latest version available from your motherboard manufacturer.
3. Run Windows Memory Diagnostics
Since hardware issues related to RAM frequently appear in crash reports (often flagged as WHEA errors), it’s essential to test your memory for faults:
- Type mdsched.exe into the Start menu or Run dialog and run it.
- Allow the system to reboot and complete the test; review the results for any faults.
- If errors are present, try reseating, swapping, or testing with individual RAM modules.
4. Temporarily Disable Virtualization Software
If you use third-party hypervisors like VMware Workstation, VirtualBox, or Docker Desktop, consider disabling or uninstalling them temporarily. Recent system updates or driver changes sometimes cause compatibility issues that affect specific VM configurations or hypervisors.
5. Keep Windows Updated
Regularly check for Windows updates (Settings > Update & Security > Windows Update). If the problem started after a specific update, consider rolling back that update until a fix is issued, as hotfixes are often released for these issues.
6. Perform a Clean Boot
A clean boot can help identify if background processes or startup programs interfere with virtualization or drivers:
- Open msconfig and access System Configuration.
- On the Services tab, check ‘Hide all Microsoft services,’ then disable the remaining services.
- Switch to the Startup tab and click Open Task Manager. Disable startup items.
- Restart the system and verify if the BSOD persists.
7. Replace Hardware Components
Reports indicate that replacing CPUs (particularly Ryzen models), RAM, or power supplies can uncover faulty hardware. Testing with alternate compatible parts can determine if a component is causing the issue. If errors stop after replacing a CPU or memory module, consider RMA services for defective hardware. Además, revisar la salud de los discos mediante herramientas específicas puede evitar otros errores relacionados.
8. Collect Minidump Files
Minidump files contain critical crash data. Sharing these with experts or support forums can assist in diagnosing the root cause:
- Navigate to C:\Windows\Minidump. Copy ‘.dmp’ files and compress them into a ZIP file.
- Upload to cloud storage (e.g., OneDrive) and share the link.
- Refrain from uploading large ‘Memory.dmp’ files unless explicitly requested, as they are much larger.
Technical Insights from Real-World User Reports
Combining feedback from Microsoft Q&A, Reddit, and sysadmins, some recurring themes are evident.
VMware and Virtual Machine Platform Issues
If you experience consistent host crashes when starting a specific VMware VM after a Windows update, it’s often due to changes in how Windows Hypervisor interacts with nested virtualization. Some solutions include:
- Disabling Hyper-V features in Windows Features.
- Turning off Virtual Machine Platform and Windows Hypervisor Platform if unnecessary.
- Ensuring VM configurations (UEFI, Secure Boot) match current system requirements.
- Testing the VM on a different machine to rule out corruption.
- Redownloading or restoring VM images from backups.
- Monitoring VMware forums for official fixes or patches if the issue persists with the latest version.
Diagnosing Hardware Errors
Many errors are linked to faulty CPUs or RAM modules. If event logs mention WHEA ID 46 or ‘Machine Check Exception,’ prioritize hardware testing:
- Replace or test CPUs and RAM sticks individually.
- Use tools like CrystalDiskInfo to confirm drive health, as failing drives can cause system crashes.
Additional Diagnostic Tips
- Monitor temperatures to prevent overheating.
- Ensure stable power supply as insufficient wattage or defective PSUs can cause unpredictable BSODs.
- Check storage health with diagnostic utilities to rule out storage-related issues.
When to Seek Professional Assistance
If troubleshooting does not resolve the issue or if you’re uncomfortable performing hardware diagnostics, consult a qualified technician or contact your hardware manufacturer. Hardware warranties exist to facilitate repairs or replacements, and professionals have access to advanced diagnostic tools that can identify obscure problems.
Key Takeaways for Resolving Hypervisor Errors in Windows 11
This HYPERVISOR_ERROR can be disruptive, but most cases are fixable by updating drivers, verifying BIOS settings, and testing hardware components. Sometimes the solution involves disabling conflicting virtualization features; other times, identifying a hardware defect like a bad CPU or faulty RAM is necessary. Patience, methodical troubleshooting, and the willingness to seek expert help are crucial. This structured approach helps transform complex BSOD issues into manageable problems, making your system stable and reliable again.
How to Troubleshoot and Fix Stop Code Errors (BSOD) on Windows 11: The Complete Guide