
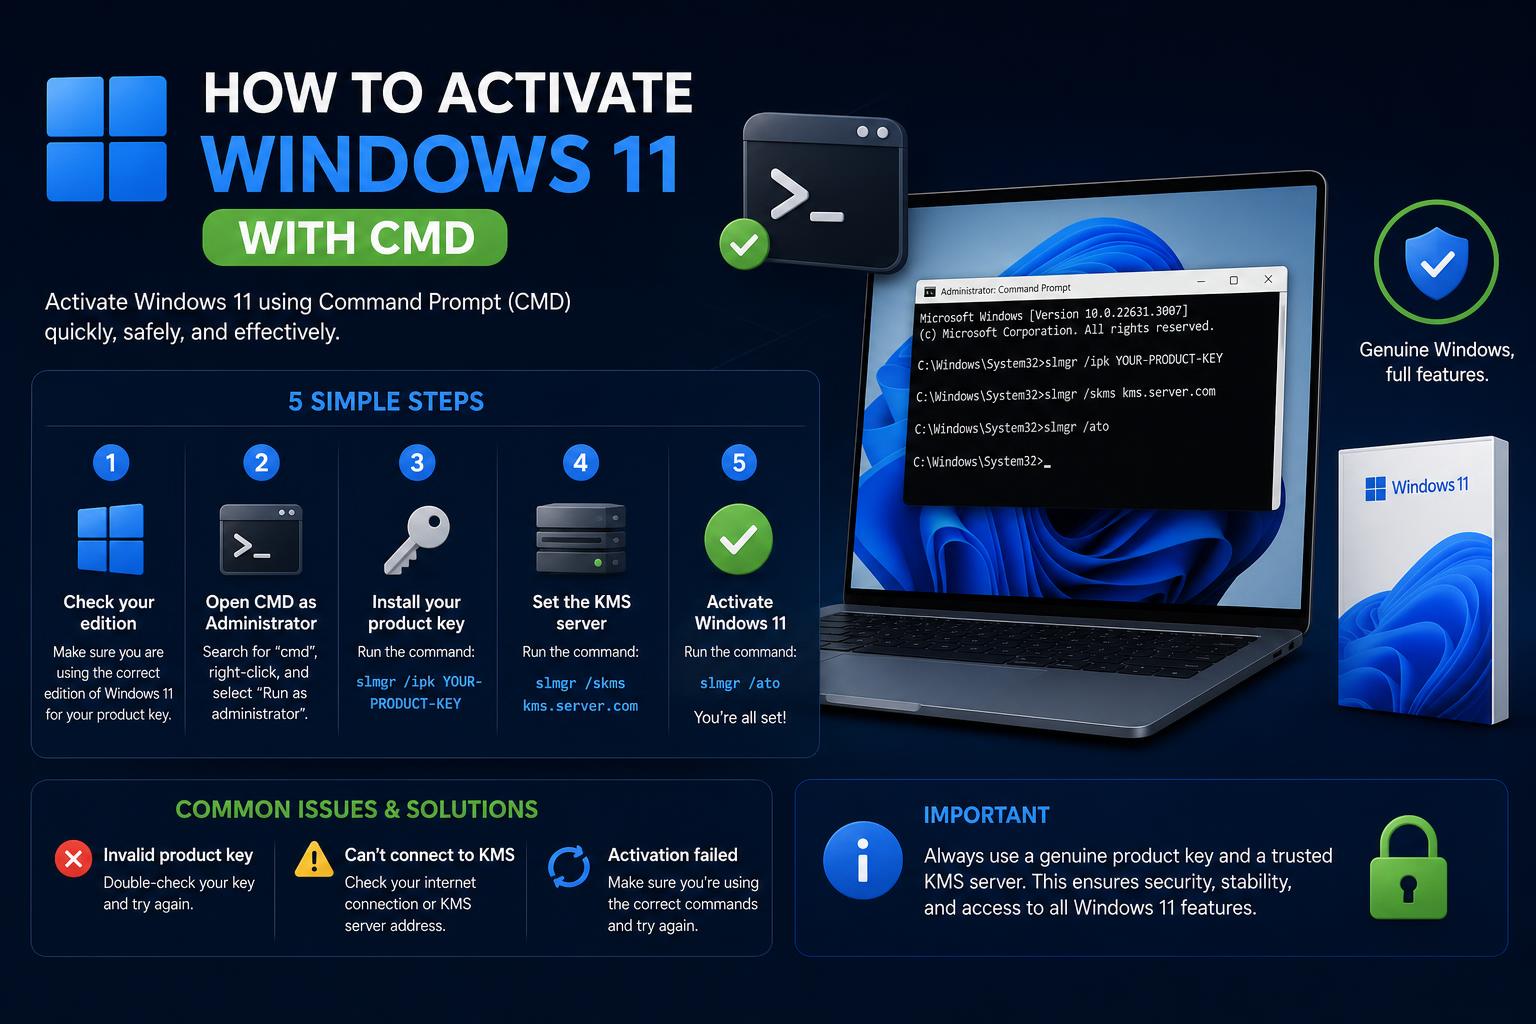
- Review the importance of Windows 11 activation for unlocking full features and updates.
- Understand the multiple free activation methods available without a retail product key.
- Get familiar with KMS activation, digital licensing, and ensuring eligibility for upgrading editions.
If you’ve landed here, chances are you’re either staring at that pesky ‘Activate Windows’ watermark or you just want to figure out this whole Windows 11 activation process using Command Prompt (CMD). Whether you’ve got a brand new PC, upgraded from an older version, or you’re just the curious type, unlocking the full potential of Windows 11 sometimes means taking matters into your own hands, especially when you don’t have a retail product key handy.
Good news—activating Windows 11 with CMD isn’t as mystical as it sounds. In fact, the web is brimming with detailed guides, all sharing methods and walkthroughs: from free KMS-based activation to management of digital licenses, even to pre-checking your eligibility for Pro upgrade. Here, you’ll find a detailed, easy-to-follow, and exhaustive guide that draws on the top-ranked resources in the field, so you’ll have all the steps, safety tips, and practical context about Window 11 activation—no piece left out.
Why Activate Windows 11? Unlocking the Full Experience
Activating your Windows 11 installation is crucial for enjoying all the features, security updates, and a system free from annoying reminders or restrictions. It’s not merely about aesthetics—it’s also about securing your device, gaining access to new updates, and ensuring compliance with Microsoft’s licensing policies. Some users mainly run into activation issues after installing Windows fresh, changing hardware, or skipping the step during setup. The splash screen watermark that demands activation, combined with nudges about missing features, means you’ll definitely want to sort this out.
Activation Methods: An Overview Before You Use CMD
Activation for Windows 11 can be achieved through different official and unofficial ways:
- Digital License: Linked directly to your Microsoft Account and unique hardware ID, usually from upgrades or official online purchases.
- Product Key: A 25-character unique code bought from Microsoft or a third-party store. Once entered, it activates your install.
- KMS Activation & SLMGR (Command Line): For advanced users, using built-in CMD tools to apply generic or KMS keys, or to troubleshoot activation state.
Below, we’ll focus on step-by-step CMD methods, touching on both free and official options.
Step 1: Open Command Prompt in Administrator Mode
Almost every activation or troubleshooting command for Windows 11 needs to be run with administrative rights. Here’s the easiest way to launch CMD as an admin:
- Press Windows key + R to pop up the Run box.
- Type cmd.exe.
- Instead of just hitting Enter, press Ctrl + Shift + Enter: this ensures CMD opens in elevated, administrator mode.
- When prompted with User Account Control, click Yes.
You’re now running commands with the necessary permissions to manage licenses and activation on your system.
Step 2: Check Your Current Activation Status and Edition
First, let’s see what license is currently active on your device and what edition you’re running. This helps you choose the best method for activation or upgrade.
- In CMD, type or paste:
slmgr.vbs /dlv - Press Enter and wait for a detailed information window to appear (yes, it’ll look a bit retro!).
- Take note of your Windows Edition and Activation status. (If you want to avoid sharing your product key in forums or with anyone else, don’t include it in any screenshots you post for help.)
If you want to dig deeper or see Windows keys stored on your device, the ShowKeyPlus app from the Microsoft Store is a handy (and official) option to extract license info—just obscure the product key before sharing any screenshots.
Step 3: Consider Backup and Restore Points Before Making Changes
Playing with system licensing or edition upgrades can sometimes go wrong, especially if your activation data or digital license is not backed up, or if you’ve bought non-Microsoft product keys that don’t stick between reinstalls. So, it’s smart to create a restore point before you continue:
- Search “Create a restore point” in the Start menu.
- Select your system drive (usually C:), then click Create.
- Set a name you’ll remember, like “Before Win11 Activation”.
- Wait for the process to finish—this “undo button” could save you headache if anything fails.
If you like automation, there are batch tools (such as the Restore Point Tool from this GitHub Gist) that make creating restore points even easier.
Step 4: Uninstall Any Conflicting Keys or KMS Servers (Optional, But Recommended)
If your Windows 11 copy previously had another license, a failed upgrade, or old activation key lingering, it’s a good idea to ‘clean the slate’ using these CMD commands:
- In admin CMD, enter:
slmgr.vbs /upk(uninstalls current product key; click OK on the popup). - Next, run:
slmgr.vbs /cpky(removes product key from the registry; again, click OK). - Then, clear any old Key Management Service (KMS) server configs:
slmgr.vbs /ckms. - Click OK on any messages.
Doing this prevents activation clashes during upgrade or when applying a new key/KMS activation.
Step 5: Check if You Can Upgrade Edition for Free (e.g., Home to Pro)
Some guides—like the GitHub Windows 11 Pro Activation Guide—suggest you review eligibility for free upgrade (from Home to Pro or other editions). Here’s how:
- In CMD, type:
DISM /online /Get-TargetEditions - Look for “Professional” (or your desired edition) in the output list. If it appears, your system can be upgraded seamlessly.
Note: If your edition isn’t eligible, these methods below might not work flawlessly, and you may need to purchase the upgrade officially.
Step 6: Manual Activation Using Free KMS Client Key (No Third-Party Tools)
For educational and evaluation purposes, Microsoft assigns volume license (KMS) client keys to Windows editions. You can use these volume keys to activate Windows via the command line in tandem with a public KMS server. (Just remember: while these keys are legal for evaluation and volume licensing contexts, they are not meant for permanent personal use without legitimate KMS infrastructure.)
- Install the KMS Client Key for Your Edition:
In CMD:slmgr /ipk [KMSClientKey]
Replace [KMSClientKey] with one of these, according to your Windows edition:- Home: TX9XD-98N7V-6WMQ6-BX7FG-H8Q99
- Home N: 3KHY7-WNT83-DGQKR-F7HPR-844BM
- Home Single Language: 7HNRX-D7KGG-3K4RQ-4WPJ4-YTDFH
- Home Country Specific: PVMJN-6DFY6-9CCP6-7BKTT-D3WVR
- Pro: W269N-WFGWX-YVC9B-4J6C9-T83GX
- Pro N: MH37W-N47XK-V7XM9-C7227-GCQG9
- Education: NW6C2-QMPVW-D7KKK-3GKT6-VCFB2
- Education N: 2WH4N-8QGBV-H22JP-CT43Q-MDWWJ
- Enterprise: NPPR9-FWDCX-D2C8J-H872K-2YT43
- Enterprise N: DPH2V-TTNVB-4X9Q3-TJR4H-KHJW4
- Set the KMS Server:
Enter:slmgr /skms kms.msguides.com
This connects Windows to a public KMS server provided for activation by the community. - Activate Windows:
Enter:slmgr /ato
If you get error 0x80070005 (‘server busy’), simply re-run the command after a few minutes.
Your Windows 11 installation should show as ‘activated’ under Settings → System → About or Settings → System → Activation.
Step 7: Automated Activation and Upgrading Pro for Free
A comprehensive GitHub guide describes another method to force-upgrade and activate Pro without a product key:
- Kickstart Windows services for license management by entering the following in CMD:
sc config LicenseManager start= auto & net start LicenseManagersc config wuauserv start= auto & net start wuauserv - Change your product key to the default Pro key:
changepk.exe /productkey VK7JG-NPHTM-C97JM-9MPGT-3V66T - Close CMD or type
exit. - Windows will begin an upgrade; at 100% you may get a weird error—just click ‘Exit’.
- Restart your computer. On reboot, Windows Pro should be installed, but not yet activated. (Sometimes it shows as Enterprise temporarily.)
Step 8: Activating Windows Pro—Multiple Methods
Method 1: CMD Activation Using KMS
- Open CMD as admin, then enter these commands, pressing Enter after each:
slmgr /ipk W269N-WFGWX-YVC9B-4J6C9-T83GXslmgr /skms kms8.msguides.comslmgr /ato
If ‘slmgr /ato’ fails, try again in a few minutes—it’s a quirk of free public KMS servers.
Method 2: Batch File Automation
You might spot batch file activators circulating online. To be safe, only use open-source options with transparent code, and always run as administrator for activation scripts. Look for links on trusted guides like this GitHub Gist. Download and run the batch as admin, follow on-screen interactions, and your PC should say “product activation successful” in the output.
Method 3: Permanent Activation via HWID (Requires Microsoft Account)
If you want a more permanent activation and your device is linked to your Microsoft account:
- Press Windows Key + R to launch Run.
- Type powershell and press Ctrl + Shift + Enter for admin rights.
- In the PowerShell window, enter:
irm https://massgrave.dev/get | iex - A script will run, presenting options for HWID (hardware ID) activation. Choose accordingly and follow instructions.
- If an error related to SKU appears, retry. Often, persistence wins!
This is the closest method to an “official” free, permanent activation—always be sure you’re on Windows 10 or 11, as it won’t work for Windows 8.1 or earlier.
What About Digital License Problems?
Sometimes, your copy of Windows 11 is tied to a digital license associated with a Microsoft Account—especially when you’ve upgraded, or bought directly from the Microsoft Store. If you changed hardware or are getting weird error codes, try:
- Sign in to your Windows device with the same Microsoft Account originally used for purchase/activation.
- Go to Settings → System → Activation.
- See if the correct Edition is installed. If you have ‘Home’ instead of ‘Pro’, install the correct edition first.
- Click Troubleshoot on the Activation screen and follow prompts—the system should find your license automatically.
If this doesn’t resolve things, copy the exact error code from the Activation page and search for forum help or Microsoft support—it helps narrow issues down quickly.
Important Troubleshooting Tips, Legal Notices, and Gotchas
- Always use official sources when possible. Public KMS servers (like kms.msguides.com) are often used for non-commercial activation, but for corporate or permanent setups, stick to legitimate channels.
- If activation fails repeatedly, check for editions mismatch, active internet connection, correct commands, or Microsoft account association.
- Restoring Windows is safe if you’ve created system restore points before starting. That way, you can always roll back without losing files.
- If you’re just testing Windows 11, consider using a virtual machine or a secondary device, especially for methods that are not supported by Microsoft for everyday users.
For additional reference and tools, visit guides and scripts from resources like the MSGUIDES Windows 11 tutorial or explore repositories such as Windows 11 Pro Product Key Activation on GitHub.
Navigating Windows 11 activation with CMD isn’t just a technical trick—it’s a clever way to make your OS fully functional, especially if you’re between product keys or testing editions. By following proven, script-based, and manual activation workflows, you avoid common pitfalls and tap into the most up-to-date strategies seen across the web. Take your time, create backups, and always prioritize your license’s authenticity for the best Windows 11 experience, both short-term and in the long run.