
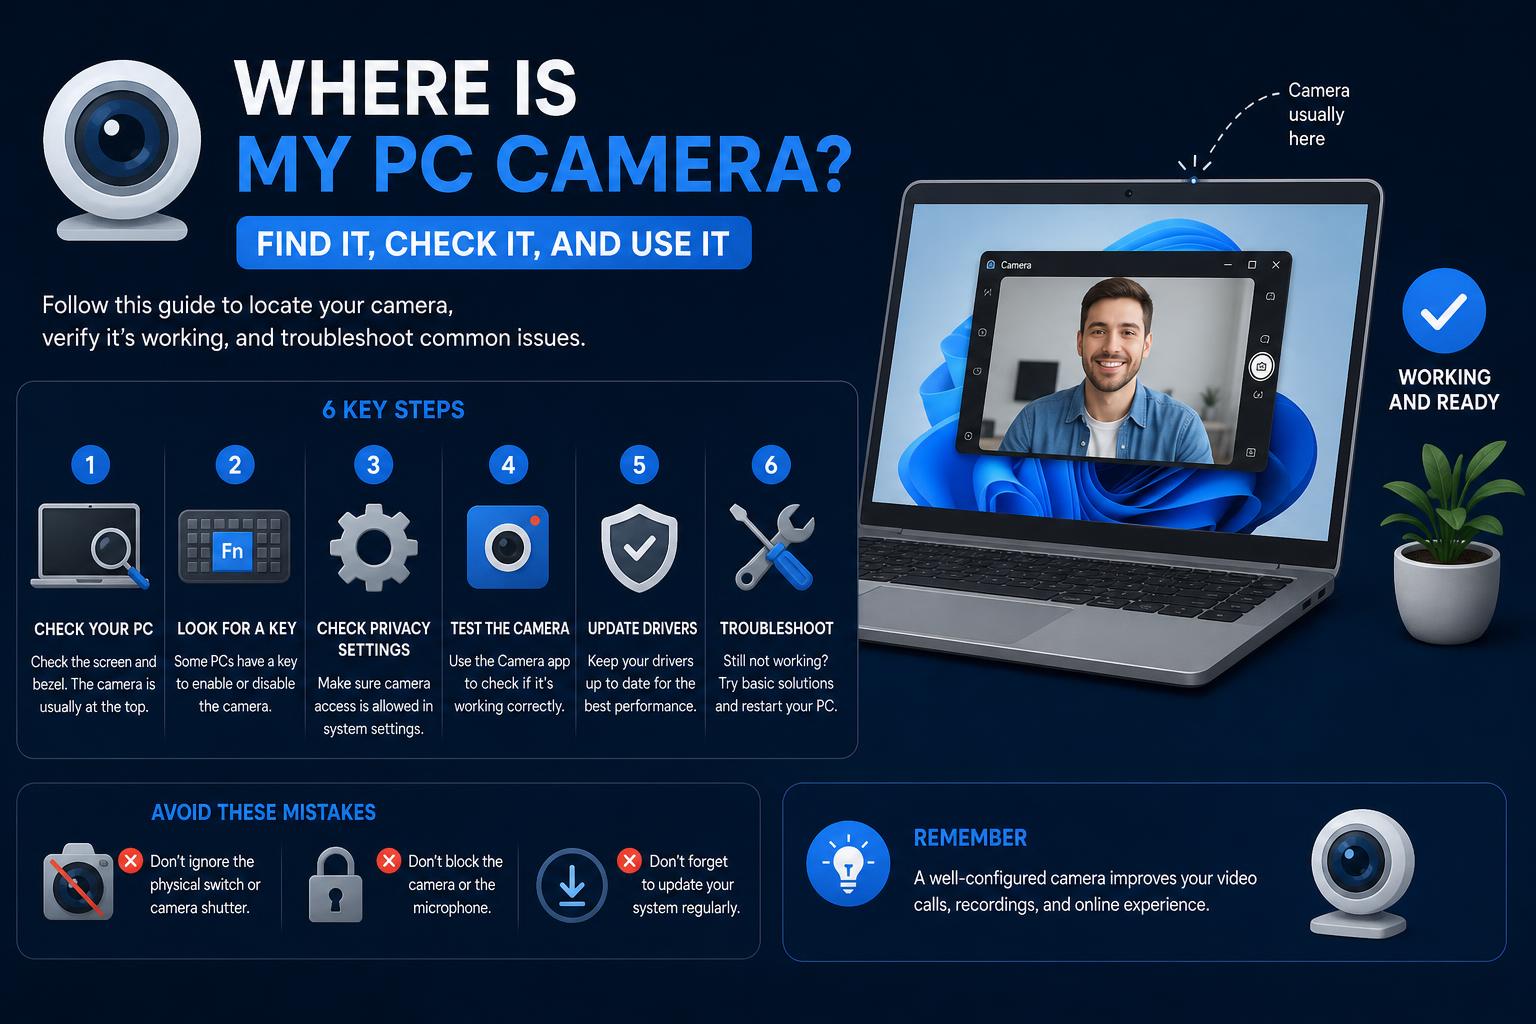
- Most modern laptops and desktops offer built-in or attachable webcams that are easy to identify and use within Windows.
- Microsoft’s Camera app provides versatile features, making photo, video, and document capture straightforward for any user.
- You can troubleshoot and configure your webcam settings to resolve issues, safeguard privacy, and enhance your experience.
Has it ever felt like your PC camera is playing hide and seek? Maybe you’re about to jump into a video call or want to snap a quick photo, but you can’t figure out where your webcam actually is—or if your computer even has one. You’re definitely not alone. The introduction of built-in cameras on laptops and the ease of adding external webcams to desktop PCs should make things simple, but sometimes the camera’s presence is anything but obvious. Whether you’re new to using webcams or just facing a tricky situation where your camera is missing in action, getting it up and running is totally doable—and we’re here to help you every step of the way!
In this ultra-comprehensive guide, you’ll discover everything there is to know about finding, enabling, and making the most of your PC’s camera. No complicated jargon, just real advice based on genuine questions and how the pros at Microsoft recommend you approach it. If you’re ready to bring your webcam out of hiding, let’s dive in.
How to Tell if Your PC Has a Camera
Not all computers are equipped with a camera, especially older desktops, but today’s laptops almost always feature a built-in webcam. Here’s how you can quickly figure out if your device sports one:
- Look for a small lens at the top center of your laptop screen. It often resembles a tiny black dot directly above the display or in the upper bezel.
- On desktop PCs, check for a separate webcam attached to the top of your monitor or nearby. External webcams often have a noticeable lens and sometimes a USB cable running into your computer.
- Some all-in-one desktop computers also include a camera at the center or edge of the screen.
- For hybrid tablets and convertibles, examine the upper screen bezel or even both sides (some devices have rear and front cams for photos and video calls).
Finding nothing? Don’t worry—let’s confirm it via Windows:
- Hit the Start menu and type “Device Manager”. Open it, then expand the “Cameras” section. If a camera is present, you’ll see it listed (e.g., “Integrated Camera”, “HD Webcam”, or a manufacturer name and model).
- If you don’t see “Cameras,” try looking under “Imaging devices” or “Audio inputs and outputs” for anything resembling a camera or webcam.
If you do not find any camera listed, your PC most likely lacks a webcam or it is disabled in the BIOS/UEFI, or there could be a driver issue. You can always connect an external webcam via USB if you need one.
[relacionado url=”https://www.ikkaro.net/fixing-camera-issues-in-windows-11/”]
How to Check if Your Camera Is On and Working
Worried about privacy or just not sure if your camera’s actually on when you open an app? Most webcams—especially on laptops—feature a tiny LED indicator light next to the camera lens that glows when it’s active. If this light is off, your camera likely isn’t capturing anything.
But there’s more than one way to check:
- Open the Windows Camera app (search for “Camera” in the Start menu and select the result). If you see a real-time video preview, your camera is correctly connected and engaged.
- Apps like Microsoft Teams, Skype, or Zoom will also display your video preview if the camera is functioning. When you join a call or check your video settings in these apps, you’ll either see yourself or get a message indicating the camera isn’t detected.
- Re-check in Device Manager after restarting your PC or running Windows Update, as some driver errors or updates may reactivate your camera.
Accessing Your Camera: The Windows Camera App
Microsoft’s bundled Camera app on Windows 10 and Windows 11 covers the basics and plenty more, no matter what you want to do with your PC webcam.
Launching the Camera App
- Click the Start button and type “Camera” in the search bar. Select the Camera app from the results.
- If you prefer shortcuts, find the Camera app pinned in your Start menu or taskbar, or use voice commands with Windows Search.
Switching Between Multiple Cameras
If your device has more than one camera—maybe a laptop with both front and rear, or you’ve plugged in an external webcam—you can pick which one to use:
- Inside the Camera app, click the Change camera icon located in the top right.
- You can toggle through the available cameras until you see the preview you want.
Taking Photos and Viewing Them
- Open the Camera app.
- Ensure the Photo mode is selected (look for a camera icon on the screen’s side).
- Click the large Take photo button to snap a picture.
- Your new photo appears as a thumbnail at the bottom or corner of the app. Click it to open the full image.
Once you’ve taken a photo, you can:
- Zoom: Use the slider or multitouch gestures to zoom in or out.
- Rotate: Hit the rotate button to turn your photo by 90° increments.
- Delete, copy, or open the folder holding your photos directly from the Camera app interface.
- Send to, print, or edit the photo in the Windows Photos app with another click.
- Switch between Photo, Document, and Whiteboard modes to adjust for what you’re capturing. Document/whiteboard scanning is handy for digitizing notes, receipts, or physical documents.
Recording Videos with Your PC Camera
- Launch the Camera app.
- Select Video mode (usually beside the photo option).
- Click Take video to begin recording. You’ll notice a timer and red highlight.
- When finished, tap Stop taking video. The video will appear as a thumbnail, ready to view or share.
- Like with photos, you can play back, delete, export, or locate your video files through the Camera app.
Scanning Codes, Documents, and Whiteboards
The Camera app isn’t just for faces—it’s a surprisingly powerful scanner!
- QR code/barcode scanning: Choose the Barcode mode, point your camera at the code, and let Windows grab the link or text automatically. For QR codes, you’ll often see a website link pop up to click. For barcodes, the decoded info is displayed for easy copying.
- Document and whiteboard scanning: Select the desired mode, place your document or board in the frame (making sure it fits inside the blue box the app draws), and hit capture. The Camera app will digitize and crop your notes. Thumbnails of scans are instantly available for editing, sharing, or saving as PDFs.
Troubleshooting: What If My Camera Doesn’t Work?
Sometimes, you’ll run into trouble—like your image not showing, error messages in apps, or the camera flat-out missing from Device Manager.
Basic Fixes
- Check for Windows Updates: Keeping your system current often fixes driver problems. Head to Start > Settings > Windows Update and run any pending updates.
- Make sure camera permissions are enabled: In Settings > Privacy & security > Camera, ensure access is granted for your apps, especially the ones you use for video calls or photos.
- Reboot device: Sometimes, a simple restart re-enables your camera if it’s misbehaving.
- Try plugging an external webcam into a different USB port if yours isn’t showing up.
Advanced Steps
- Reinstall or update your camera driver in Device Manager. Right-click your camera, select “Update driver,” and choose “Search automatically for drivers.” If Windows can’t find a newer driver, visit your computer manufacturer’s website for downloads—especially on laptops from Dell, HP, Lenovo, etc.
- If you don’t see any camera device at all, it could be disabled in your BIOS/UEFI. Reboot into your PC’s firmware settings and look for Imaging or Camera options to enable.
- Some privacy switches on newer laptops physically disconnect the webcam (look for a slider or button near the camera itself, or a shortcut key on your keyboard with a camera icon). Make sure it’s “on.”
[relacionado url=”https://www.ikkaro.net/camera-driver-installation-and-troubleshooting-on-windows-11/”]
Protecting Your Privacy While Using a Webcam
Cybersecurity and privacy are always important when using a camera. Here’s how to stay safe and in control:
- Check for the camera activity light: Most webcams display an LED next to the lens, so if it isn’t on, your camera isn’t streaming (though not all models have LEDs).
- Control your app permissions: Limit which apps have webcam access by visiting Settings > Privacy & security > Camera. Toggle access off for apps you don’t recognize or need.
- Physically cover your camera: Use a sliding webcam cover, a small piece of opaque tape, or close your laptop lid when not using the camera.
- Keep software updated: This includes Windows itself and any video conferencing apps.
It’s rare, but malware can attempt to access your camera without permission. A combination of the above steps gives you peace of mind.
Exploring Advanced Features in the Windows Camera App
Today’s Camera app isn’t just a point-and-shoot tool—it packs plenty of advanced options, which can really boost your experience:
Customizing Camera Settings
- Open the Camera app.
- Click the Settings gear icon in the upper left (or via the “…” menu for certain versions).
- Explore four main categories:
- Camera settings: Toggle advanced photo/video controls, set grids, and change button delay actions.
- Photo settings: Adjust image quality or implement time lapse for creative shots.
- Video settings: Tweak video quality and reduce flicker for better video calls in various lighting conditions.
- Related settings: These link directly to deeper configuration in Windows Settings for privacy, device properties, and more.
Adding Location Information
If your device has GPS or can estimate location, the Camera app can save where each photo was taken:
- From Settings > Privacy & security > Location, make sure Location services are active, “Let apps access your location” is on, and the Camera app is granted access.
- Newly taken photos will have location data embedded, viewable in the Windows Photos app and elsewhere.
Zoom Features
- On touch-enabled PCs or tablets, pinch-in with two fingers to zoom out, and spread your fingers to zoom in on a subject when using the Camera app.
Using Your Webcam with Popular Apps
Webcams aren’t just for the Camera app—you’ll use them in every modern video-calling and streaming application. Here’s how things usually work:
- Microsoft Teams/Skype/Zoom/Google Meet: During a call setup, there is always a “camera” or “video” section in your preferences. You can pick which device to use and get a preview. If your camera isn’t available, most apps will provide an error and a link to troubleshooting steps.
- Social media platforms (Facebook, Instagram on web): When live streaming or starting a video post, the browser will request permission to use your camera. Accept when prompted, ensuring you trust the site.
When You Can’t Find Your Webcam Outside of Video Calls
Some users discover their camera works fine during Zoom meetings but can’t use it outside certain apps. This is pretty common—here’s what’s going on:
- Specific software “grabs” the webcam: Apps like Zoom or Teams might monopolize camera access, blocking other tools from using it simultaneously.
- No default “camera app” installed: A few Windows editions or fresh installs might not include the Camera app by default. Search “Microsoft Camera” in the Microsoft Store and install it if needed.
- Permissions mismatch: Double-check Settings > Privacy & security > Camera to ensure access is on for all relevant programs.
If nothing else works, consider searching for your camera model’s specific software on the manufacturer’s website—it often unlocks more features (like slideshow effects or enhancements).
Adding an External Webcam to Your PC
If your device doesn’t have a built-in camera—or the current one fails—you can easily add a new webcam:
- Plug your webcam into a USB port. Most modern webcams are plug-and-play, so Windows should recognize and install the drivers automatically.
- If prompted, follow the manufacturer’s installation instructions, or check out their support page for helpful guides (e.g., Logitech, Microsoft accessories, Kentfaith).
- Once set up, access your webcam the same way as a built-in camera—via the Camera app or other video-calling software.
Tips and Tricks for Better Video Calls and Recordings
To really shine on camera, try these:
- Position your webcam at eye level for more natural conversations.
- Ensure you’re well-lit—natural window light works wonders, or experiment with a ring light if you’re often in shadowy spots.
- Keep your camera lens clean! Smudges cause blurry images. A microfiber cloth works best.
- Backgrounds matter: Neat, simple backgrounds are less distracting for your viewers.
- Mute your mic when not speaking on calls, and use headphones to avoid feedback.
If you want even more control, try third-party camera utilities or software enhancements. Just ensure you download from reputable sources and follow all installation prompts carefully.
What To Do If You Want to Take Photos, But Can’t Find Your Camera App
If you’re comfortable in video calls but can’t find a way to take solo photos or videos, there are a few explanations:
- Some devices might ship without the Windows Camera app. No worries—just install it from the Microsoft Store.
- If your webcam only works inside other apps (like Teams, Zoom), ensure those aren’t open—which can keep the camera “locked”—and try again.
- Consider updating drivers or running the built-in Windows Troubleshooter from Settings > Update & security > Troubleshoot > Additional troubleshooters > Camera.
Community Help and Online Resources
Still stuck? The Microsoft Q&A site and tech forums like Reddit’s TechSupport provide real-world solutions to quirky camera problems. While Reddit threads offer peer-to-peer troubleshooting, official Microsoft articles ensure you get up-to-date info and manufacturer guidance.
Platforms like Quora sometimes feature personalized answers for rare hardware or setup issues, especially if you share your laptop’s make and model. Don’t be shy—adding details when you post a help request gets you results faster.
When you visit a manufacturer’s site (like Kentfaith for camera accessories), check their FAQ, blog, and downloads section for webcam manuals and troubleshooting flows tailored to your hardware.
Whether you’re using a sleek modern laptop, a sturdy desktop, or switching between multiple webcams, today’s Windows PC environment gives you all the tools you need to become a camera pro. Knowing where your PC camera is, what it can do, and how to use each feature means better video calls, sharper photos, and less time hunting for where things went. From identifying your hardware to maximizing privacy and troubleshooting weird errors, everything is within your control. Next time a video meeting’s about to kick off, you’ll be set to shine in the frame, with full confidence your PC camera is right where you need it—ready for work, play, or anything in-between.