
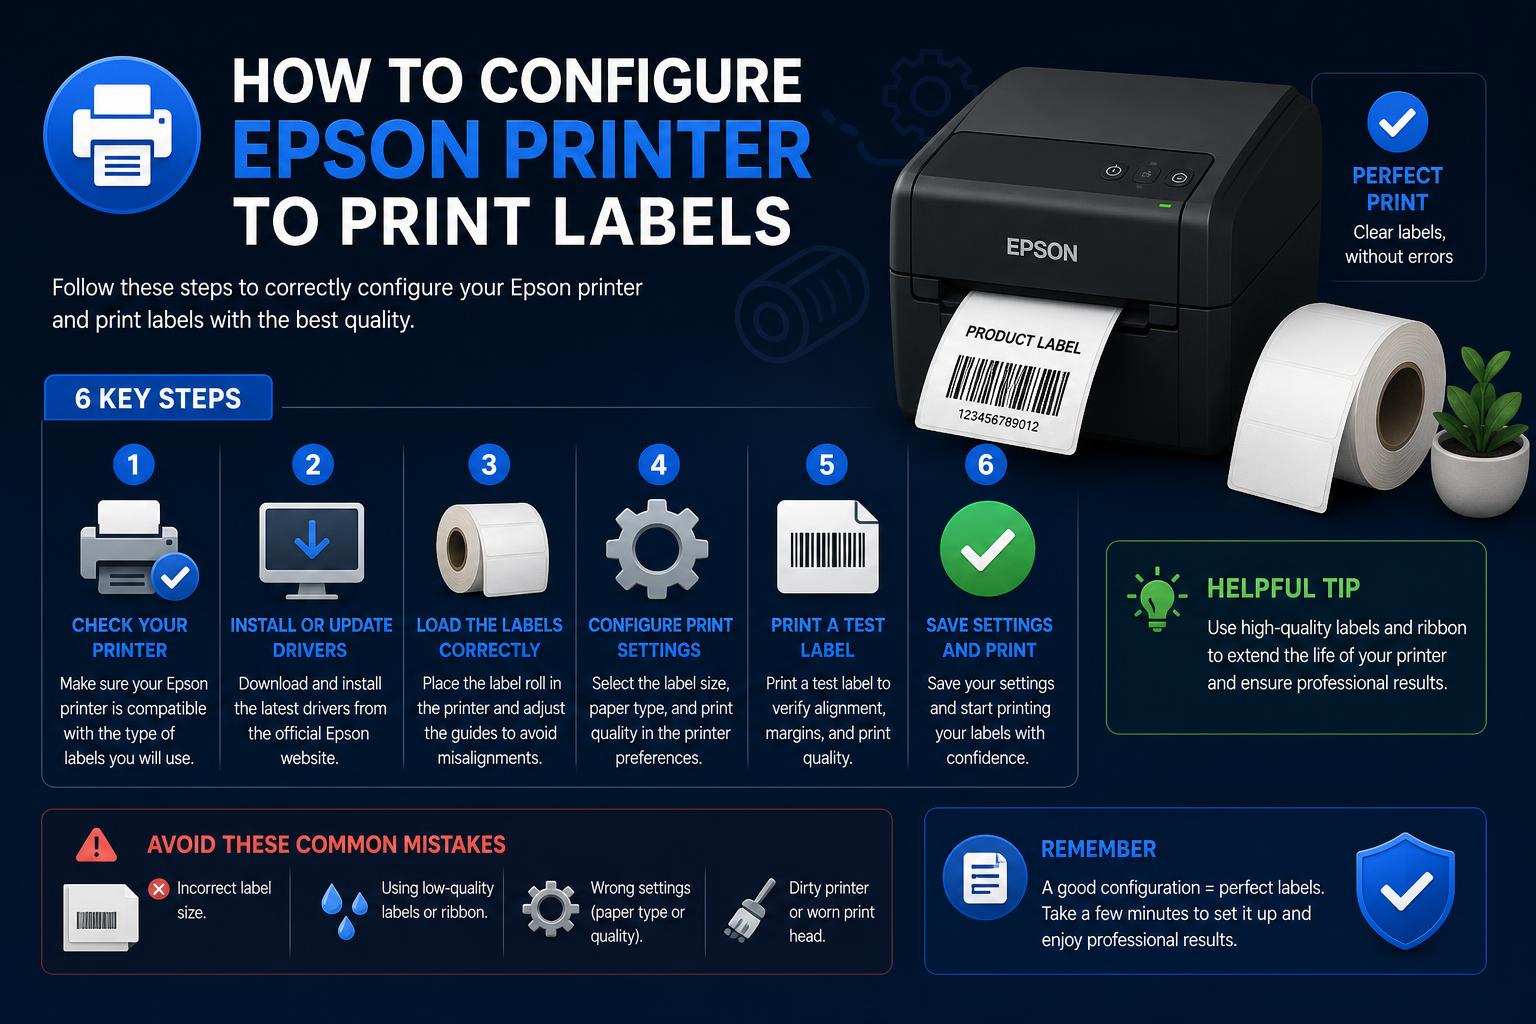
- Using the right label material and matching templates is essential for error-free printing.
- Proper configuration of printer settings directly impacts the quality and alignment of labels.
- Utilizing design software and preview checks can prevent common issues like misalignment and smearing.
Printing labels with your Epson printer might seem intimidating if you haven’t tackled the process before, but mastering it can save you time, money, and plenty of headaches. Whether you’re labeling parcels, organizing files, or branding products, knowing how to configure your Epson printer correctly makes a world of difference in the final result. This guide walks you through every important aspect of configuring Epson printers to print professional-quality labels at home or in your business, by combining best practices, official tips, and expert tricks for getting the most out of your devices.
We’ll cover compatible label types, essential printer settings, label design strategies, software choices, as well as crucial troubleshooting advice to ensure flawless prints every time. If you’re aiming for labels that not only look sharp but also stick perfectly and avoid misalignments or annoying white borders, this article is packed with actionable know-how gained from both manufacturer resources and label printing pros.
Understanding Label Printing with Epson Printers
Label printing goes beyond just feeding a sheet into your printer—proper setup matters to prevent wasted supplies and inconsistent results. From choosing the right materials, to configuring optimal settings in your Epson software, attention to detail is key for both home users and businesses that require durable, high-quality labels.
Choosing the Right Labels for Your Epson Printer
The first step in your label-printing journey is picking compatible label stock for your printer model. Different Epson printers—especially the ColorWorks and LabelWorks series—accept various materials, including matte, glossy, synthetic, and special-use labels. Always verify your printer’s manual for supported label types and recommended suppliers.
- Matte Labels: Great for general use; they’re easy to write on and ideal for file folders or shipping labels.
- Glossy Labels: Provide a polished look, perfect for product packaging or branding tasks.
- Synthetic and Specialty Labels: Designed for water resistance, durability, or outdoor use.
Check Epson’s extensive official guide for details.
When selecting label sheets, make sure they match your printer—some printers are made for cut label rolls, while others use sheet-fed designs. Always use materials recommended for your specific model to prevent jams or print defects.
Setting Up Labels: Templates, Layout, and Design Tools
Professional results start with proper label templates and design tools that align precisely with your hardware. Epson provides label design software, such as “Label Editor” for computer-based design, and the iLabel app for mobile use. For more complex projects, popular third-party applications like BarTender or Adobe Illustrator are also compatible.
Best-practice tips for layout:
- Use templates that match the exact size and shape of your physical labels—this ensures critical info like barcodes or logos won’t get cut off.
- When designing, always observe bleed, trim, and safety margins in your template: Keep important text and barcodes inside the safety area, extend background colors into the bleed area for “edge-to-edge” designs, and check the trim line for potential cropping points.
- For projects requiring custom shapes or sizes, use blank full-sheet labels and create your own cut lines for total flexibility.
Configuring Printer Settings for Label Printing
With your design ready, it’s crucial to dial in your Epson’s printer settings for reliable, sharp label output. Most Epson models allow deep customization through their control panels or desktop software, including:
- Paper/Label Size: Always match the label sheet size exactly; for US users, this is frequently 8.5″ × 11″ for sheet-fed labels.
- Paper Type: Select “Labels” or “Cardstock” to ensure the correct ink amount and printhead speed.
- Scaling: Select 100% (Actual Size) to avoid off-centered prints—do not enable “Fit to Page.”
- Feed Direction: Confirm which side and edge feeds first by running a quick test with a marked plain sheet.
Advanced adjustments in “Label Editor” or your printer’s driver interface might also include:
- Tape Width: Let the printer detect the tape width automatically, or set it manually for precision.
- Orientation: Vertical or horizontal, depending on your design.
- Print Quality (Resolution): Choose an appropriate dpi (like 180 dpi) for sharp graphics or small text.
- Dithering and Print Modes: Set image handling options (rough, fine, line art, or bw) based on your source images and quality preferences.
- Mirror Print: For clear labels intended to be stuck on transparent surfaces, enable mirror image printing.
- Cut Settings: Decide if labels should be cut individually after each print (for easy handoff) or after the entire job for batch processing.
- Print Density (Concentration): Adjust for lighter or bolder prints depending on your application.
Step-by-Step Process: Printing Labels with Epson Printers
Below is a detailed walkthrough that brings together official guidance and proven professional workflow tips for the best possible results on your Epson device:
- Select and Load Label Material: Choose a label stock rated for your printer, ensuring the correct width or sheet format. Open the printer tray and position your labels—most jams and misfeeds come from improper loading, so double-check guides and pressure points in the tray.
- Open Your Label Design in Software: Launch Epson’s Label Editor, iLabel app, or your chosen third-party design tool. Import or create your layout, paying attention to margins and critical design elements.
- Choose the Print Function: For Label Editor, click the print icon to bring up configuration and preview options. If your design includes serial numbering or data importing (from Excel, for example), enable appropriate settings for batch production.
- Review All Print Options: Tweak copy count, print order (useful with merged data), collation, and print/paste ranges if available. Access “Printer Settings” for further adjustments—explore each tab for material-specific options: paper, graphics, cut method, and measurements (mm or inches as needed).
- Check Advanced Options: In the print preview or settings menu, verify if you need to enable mirror print, adjust print density for darker or lighter outcomes, or turn on preview features for ultimate peace of mind.
- Preview and Test on Plain Paper: Before sacrificing label stock, always print a test page on regular paper. Place your label sheet and test print against a light source to check that everything aligns perfectly—an inexpensive step that saves a lot of frustration.
- Finalize and Print: Confident in your settings? Load the label material, check the feed orientation one last time, and start the print job. For multiple copies or variable data runs, monitor the process in case any error message pops up—Epson’s displays and software alerts will guide you through quick fixes if anything goes wrong.
- Inspect Your Results: Examine your printed labels for image clarity, text alignment, and correct cutting (if your printer offers automatic cutting). Especially for business use, it’s best to spot issues immediately before running large quantities.
- Apply Labels: For adhesive-backed labels, make sure surfaces are dry and free of dust for optimum adherence. If you’ve printed multiple labels without automatic cutting, use scissors or a paper trimmer for a professional finish.
Troubleshooting: Avoiding Common Label Printing Problems
Even with the right setup, you might occasionally encounter label jams, alignment shifts, error messages, or ink smudging. Here are proven techniques to remedy common printing headaches:
- Misaligned Prints: Double-check template alignment within your design software and make sure scaling is set to 100%. Running a test print saves materials and quickly reveals alignment mismatches.
- Smearing or Fuzzy Edges: For best print quality, always set the media type correctly and use the highest appropriate print quality (dpi). Allow freshly printed labels to dry before handling, and stick to compatible label stock to avoid ink bleed.
- Labels Not Feeding Correctly: Ensure your label sheets or rolls are loaded in strict accordance with Epson’s guidance. Avoid using curled or damaged stock, and periodically clean your feed rollers.
- Error Messages (Like CD/DVD Tray Errors): Some users report irrelevant tray error prompts when printing labels—try uninstalling and reinstalling the print driver, check for firmware updates (especially for the XP 6100 and similar models), and consult Epson support for stubborn problems.
- White Borders or Unwanted Edges: If you’re after edge-to-edge printing, make sure backgrounds extend past the trim line into the bleed area, and select “print-to-the-edge” label styles whenever possible.
Scaling Up: Tips for High-Volume and Business Label Printing
For companies or power users, Epson ColorWorks printers like the C8000 are built to handle fast-paced, large-volume printing—in these scenarios, reliability and flexibility are vital.
- Choose rugged label materials tailored to your operational needs, such as chemical-resistant synthetics for harsh environments or tamper-evident stocks for security labeling.
- Integrate with dedicated label design and automation software, such as BarTender, to automate batch printing and connect label production with inventory or ERP systems.
- Regularly clean your printer, run maintenance checks, and keep extra consumables on hand to ensure uninterrupted output during peak periods.
- Keep your firmware and drivers up to date to benefit from ongoing stability improvements, bug fixes, and new features released by Epson.
Using Mobile Solutions for Quick Label Printing
Epson’s iLabel app lets you design and print labels right from your smartphone or tablet—a handy solution for individuals or teams needing fast, portable label production. With a user-friendly interface, you can select templates, customize text and barcodes, and send print jobs directly to compatible LabelWorks printers via Bluetooth or Wi-Fi. This tool is especially useful for onsite labeling tasks in offices, events, or warehouses. More info is available on the .
Frequently Asked Questions
- Can Epson printers handle all types of labels? Most Epson label printers are highly versatile, compatible with matte, glossy, synthetic, and specialty label stocks for a wide range of applications. Always check your model’s specs.
- Is dedicated label design software required? You can use Epson’s default software or opt for specialized programs like BarTender or general graphic design tools (e.g., Adobe Illustrator) for custom needs.
- How can I ensure the best print quality? Use recommended label material, adjust printer settings carefully, and inspect each print batch for quality before proceeding.
- Are Epson printers suitable for high-volume jobs? Absolutely—devices like the Epson ColorWorks C8000 are engineered for industrial-scale printing and offer fast, reliable performance.
Mastering the art of label printing with your Epson printer transforms routine tasks into opportunities for better organization, stronger branding, and consistent professionalism. From material choice and template selection to advanced print settings and maintenance, each step matters in producing labels that not only look great but also stand up to real-world use. With a bit of practice and the right setup, you’ll create polished, accurate, and durable labels for any need—at home or in your business—all with the help of your Epson printer.