
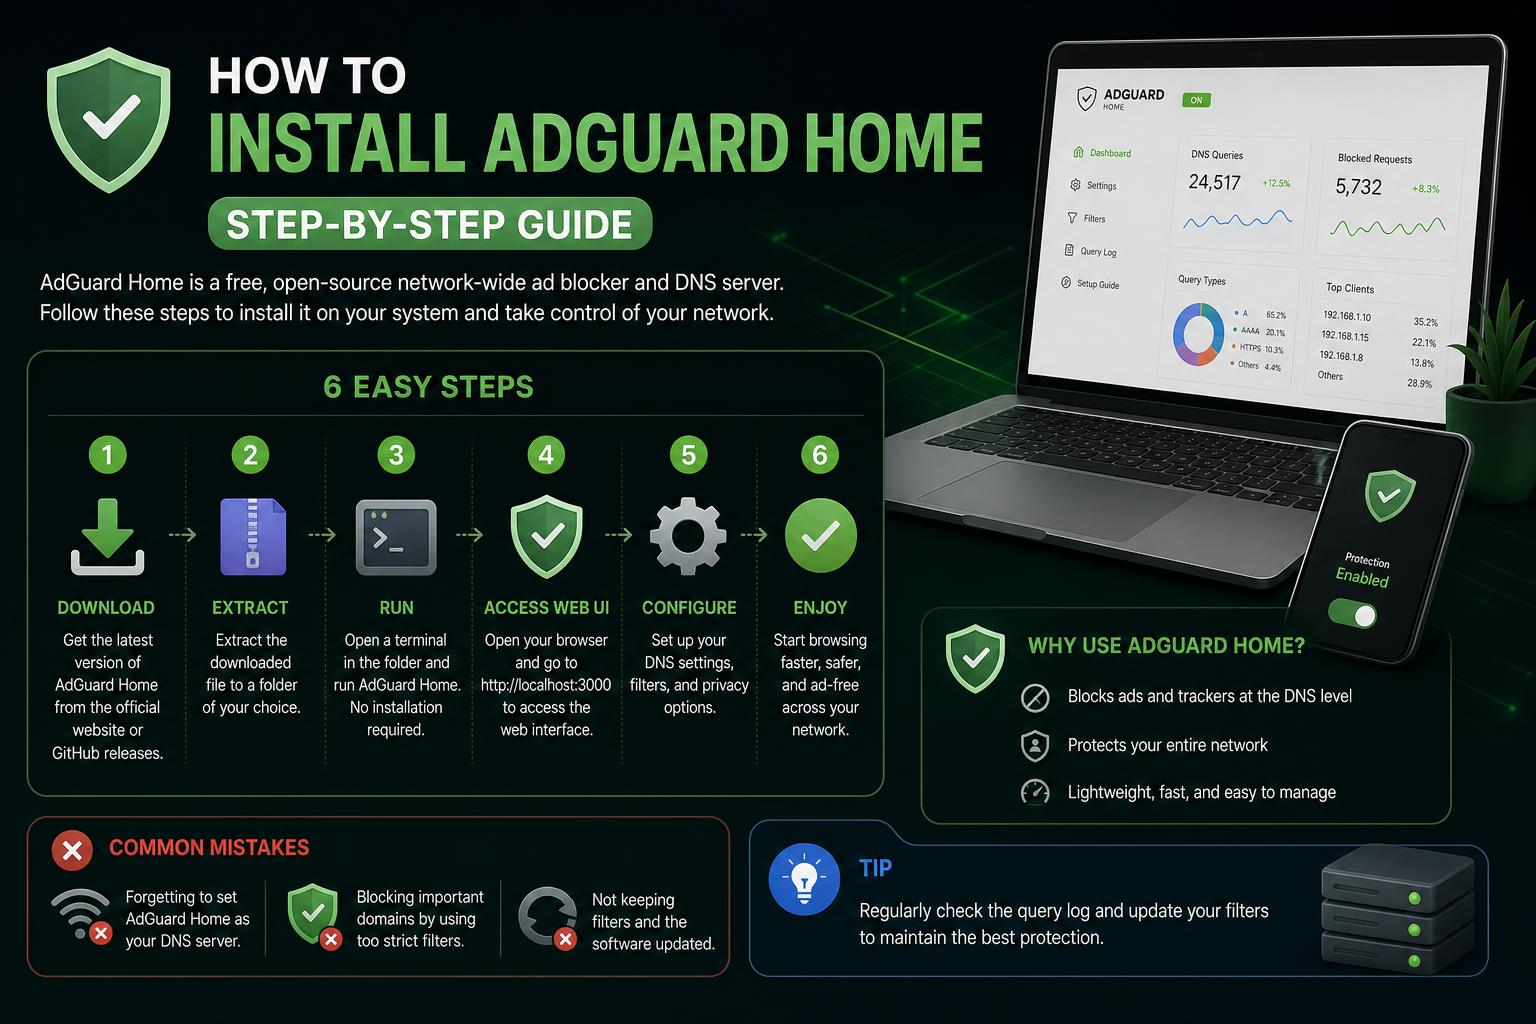
- AdGuard Home delivers network-wide ad blocking through DNS-level filtering, improving privacy and performance for all devices.
- Installation is flexible: standalone, Docker, and Snap are supported, with detailed steps for Linux, Windows, macOS, and routers.
- After setup, admin control, device/network configuration, and automatic or manual updates are accessible via an intuitive web interface.
Looking to put an end to disruptive ads and prying trackers on all your home devices, not just your browsers? You’re definitely not alone. With the rise in online advertisements, data collection, and IoT gadget usage, more people are searching for ways to take back control of their digital space. Enter AdGuard Home—an open-source, DNS-based ad and tracker blocker for your whole network that goes far beyond conventional browser plugins.
In this complete guide, you’ll get a hands-on, ultra-detailed understanding of what AdGuard Home is, why it matters, and, most importantly, how to set it up on any platform—Linux, Windows, macOS, Docker, or even directly on your router. Whether you’re brand new or you’ve tried other solutions like Pi-hole, you’ll learn how to set up, configure, and optimize AdGuard Home using the latest best practices.
What is AdGuard Home and Why Should You Care?
AdGuard Home is a self-hosted software that acts as a DNS server to block ads, trackers, malware, and adult content at the network level—not just within a browser on a single device. This means every device on your network, from smart TVs to smartphones to laptops, can enjoy a cleaner, safer, and faster internet experience without additional software.
Key features that make AdGuard Home stand out:
- Blocks ads and trackers for all devices automatically
- Provides customizable blocklists and parental controls
- Supports encrypted DNS (secure DNS-over-HTTPS, DNS-over-TLS, and DNSCrypt)
- Includes a built-in DHCP server and per-device customization
- Cross-platform—works on Windows, macOS, Linux, and more
According to the AdGuardHome GitHub, AdGuard Home isn’t just a Pi-hole alternative; it’s packed with smart additions, offering a streamlined admin panel, improved encrypted DNS features, and an easy, user-centric experience.
Overview of Installation Methods
You can install AdGuard Home in several ways depending on your environment and needs:
- Stand-alone binary download for Linux, Windows, macOS, and others
- Automated install scripts (curl, wget, fetch)
- Docker container (ideal for home labs and scalable deployments)
- Snap package (Linux users via Snap Store)
This guide covers each method, highlighting important details and setup steps.
Preparing for Installation
Before you start, decide where AdGuard Home will live:
- Dedicated machines or virtual machines —recommended for stability
- Single-board computers (like Raspberry Pi) —lightweight and effective
- Docker container —perfect for home labs and quick resets
- Natively on routers (if supported, e.g., OpenWRT)
Set a static IP address on the device running AdGuard Home, or reserve an address via your DHCP server, before installing. This avoids disruptions later when assigning devices to use your DNS server.
Step-by-Step Installation: The Essentials
Manual Binary Installation (Cross-platform)
- Head to the official AdGuard Home releases page and grab the correct archive for your operating system—there are packages for Windows, macOS, Linux, BSD, and more. If you need a beta or bleeding-edge version, check the ‘Platforms’ page or use the provided GitHub scripts.
- Extract the archive to a safe directory:
For Linux, use a directory like /usr/local/bin (Fedora and its derivatives) to avoid SELinux headaches. For macOS (10.15 Catalina and above), it’s best to place AdGuard Home under /Applications. - Open a terminal (or CMD/PowerShell on Windows), navigate into the AdGuardHome directory and run the executable:
sudo ./AdGuardHome(or simply./AdGuardHomeif you’ve configured the necessary capabilities—see tips below.) On Windows, run as administrator. - For the initial setup, AdGuard Home listens on http://0.0.0.0:3000 so you can continue the setup in a browser.
Using Automated Scripts
If you prefer a one-liner:
- With curl:
sh -c 'curl -s -S -L https://github.com/AdguardTeam/AdGuardHome/releases/latest/download/install.sh | sh' - With wget:
sh -c 'wget -qO - https://github.com/AdguardTeam/AdGuardHome/releases/latest/download/install.sh | sh'
These scripts support channel switching (stable, beta, edge), reinstall, uninstall, and verbose modes with flags like -c, -r, -u, and -v.
Docker Installation (Recommended for Many Users)
- Pull the latest AdGuard Home Docker image:
docker pull adguard/adguardhome:latest - Create persistent directories on your host for AdGuard Home’s data and config, for example:
mkdir -p /my/own/confdir /my/own/workdir - Start the container:
docker run --name adguardhome -v /my/own/confdir:/opt/adguardhome/conf -v /my/own/workdir:/opt/adguardhome/work -p 53:53/tcp -p 53:53/udp -p 80:80/tcp -p 443:443/tcp -p 443:443/udp -p 3000:3000/tcp -d adguard/adguardhome:latest - Other ports can be mapped as required (see the Docker Hub AdGuard Home page):
DHCP (67/68), encrypted DNS (853/784/8853/5443), and management ports.
Your web setup interface will be available at http://127.0.0.1:3000. Note: For DHCP mode, add --network host for full network access.
Snap Package (Linux)
Linux users can also install via Snap Store for convenience and sandboxing:
sudo snap install adguard-home
You can also run beta/edge versions by specifying channels.
Configuring AdGuard Home
Once installed and running, open the setup wizard in your browser:
- Navigate to the AdGuard Home setup page (default: http://your-server-ip:3000)
- Click ‘Get Started’ to begin guided setup
- Configure the Admin Panel and DNS server’s listening interfaces (choose the right network interface and ensure your static IP is correct)
- Set up the administrative credentials for the web dashboard—choose a secure password and a username (e.g., ‘adgadm’)
- The wizard will show recommendations for connecting devices via router, DHCP server, or manual device DNS settings
- After completing the wizard, you’re in the dashboard! This is where you can manage blocklists, configure parental controls, set up client rules, and monitor traffic.
Advanced File-Based Configuration
All settings are stored in AdGuardHome.yaml (often at /opt/AdGuardHome/). You can edit this manually or do it via the web GUI. Manual editing is especially useful for power users migrating configurations.
Network Integration: Routers, Devices, and DHCP
Setting AdGuard Home as Your Network DNS
- Access your router’s web UI (often 192.168.0.1 or 192.168.1.1) and find the DHCP/DNS settings.
- Input the IP address of your AdGuard Home server as the DNS server. This propagates ad and tracker blocking to all connected devices.
- If your router does not support custom DNS servers, you can…
- …enable the built-in DHCP server in AdGuard Home. Switch off your router’s DHCP feature, then use AdGuard Home to assign IPs and DNS info.
Some ISPs don’t allow changes or certain router models might not be as flexible. Always consult your router’s manual for specific steps or use the manufacturer’s app if needed.
Manual Device Configuration
If you want targeted ad blocking or are unable to change the router settings, configure devices individually by updating their DNS settings:
- Windows: Go to Control Panel → Network and Internet → Network and Sharing Center → Change adapter settings. Edit ‘Internet Protocol Version 4 (TCP/IPv4)’, select ‘Use the following DNS server addresses’, and enter your AdGuard Home server’s IP.
- macOS: Open System Preferences → Network → Select connection → Advanced → DNS, then input AdGuard Home server IP.
- Android: Settings → Wi-Fi → Long-press current network → Modify Network → Show Advanced, switch IP to Static, then update DNS 1 & 2.
- iOS: Settings → Wi-Fi → Tap active network → Configure DNS (Manual), then add your AdGuard Home IP.
Important Ports and Firewall Settings
- TCP/UDP 53: DNS server
- TCP 80: Web admin interface
- TCP 3000: Installation setup
- Various ports for encrypted DNS, DHCP, and additional features (853, 784, 443, 8853, 5443, etc.)
Make sure these ports are open and not occupied by other services like systemd-resolved. If conflicts occur (for example, with DNSStubListener on Linux), you may need to disable those services to avoid collisions.
Security and Running Without Root Privileges
On most Unix systems, port 53 requires superuser privileges. For extra security, you can use the setcap utility to let AdGuard Home bind to port 53 as a non-root user:
sudo setcap 'cap_net_bind_service=+ep' /path/to/AdGuardHome
Or, simply configure AdGuard Home to use a port above 1024, updating AdGuardHome.yaml accordingly.
Managing, Updating, and Troubleshooting AdGuard Home
Controlling AdGuard Home is a breeze thanks to built-in service commands:
AdGuardHome -s start– Start serviceAdGuardHome -s stop– Stop serviceAdGuardHome -s restart– Restart serviceAdGuardHome -s status– Show service statusAdGuardHome -s uninstall– Uninstall service
Logs are written to terminal when running directly, or to platform-native logging (syslog, journald, or Windows event log) if running as a service.
Updating AdGuard Home
The web UI will notify you about available updates and provide an ‘Update Now’ option. Clicking it updates AdGuard Home automatically, backing up the binary and config so you can roll back if necessary. If something fails or you want to update manually:
- Download the latest package
- Unpack to a temporary directory
- Replace your old binary
- Restart AdGuard Home
For Docker or Snap deployments, just pull the new image/build from the relevant channel and redeploy—it’s fast and easy.
Advanced Tips and Tricks
- Integrate AdGuard Home into your wider network using tools like Tailscale for remote ad blocking when you’re not at home.
- Leverage per-client settings and add custom filtering rules to personalize blocklists per device.
- Monitor network activity directly in the AdGuard Home dashboard for greater transparency and immediate insights on what’s being blocked.
- If you’re a developer, check out their REST API or third-party integrations for advanced setups and automations.
Comparing AdGuard Home to Alternatives
AdGuard Home and Pi-hole are the leading solutions for network-wide ad and tracker blocking. While both use DNS “sinkholing” to block unwanted domains, AdGuard Home stands out with more built-in features, smoother onboarding, and better support for encrypted DNS out of the box. According to the official comparison table and real-world home lab blogs, AdGuard Home is generally easier to update, maintain, and extend.
It’s important to remember that DNS-level blocking—even with AdGuard Home—can’t block ads that share a domain with legitimate content, so some web/app ads may “slip through.” For absolute blocking, consider complementing with browser or device-level blockers.
Community, Resources, and Support
AdGuard Home has an active community, with discussions on Reddit, GitHub issues, and third-party blogs sharing setup notes and troubleshooting tips. If you ever get stuck or want to customize advanced aspects like the underlying DNS statistics system (re: mmap(2) system calls, workaround via --work-dir flag), refer to the official Wiki or browse the issues section for targeted advice.
Running your own AdGuard Home puts privacy and customization back in your hands, with open-source transparency and no hidden telemetry. Once set up, you’ll realize just how much faster, safer, and cleaner your network can be—across every device your family uses. By following the steps above and exploring both simple and advanced options, you’ll be able to maintain and refine your installation for years to come, keeping annoying ads and trackers firmly out of your digital life.