
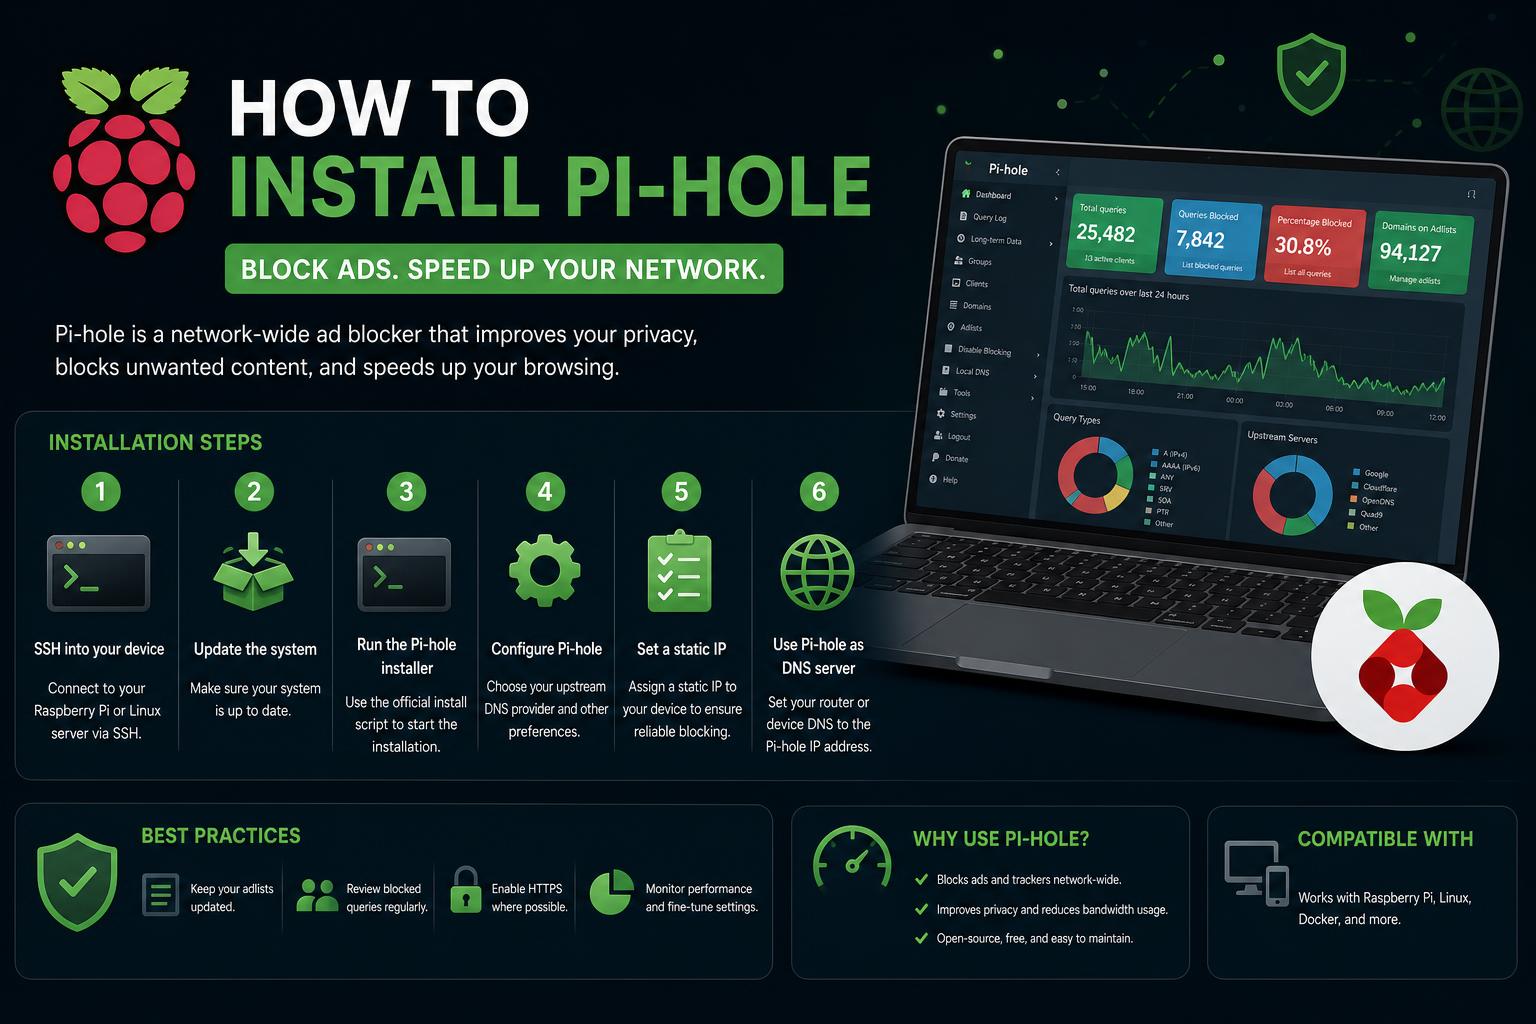
- Pi-hole can block ads across your entire network by acting as a DNS server.
- There are several installation methods available, including automated scripts and Docker deployment.
- Proper router or device configuration is essential to ensure all network traffic utilizes Pi-hole's filtering.
If you’re tired of intrusive ads showing up across your home network, constantly cluttering up your favorite apps and sites, discovering Pi-hole will feel like a breath of fresh air. Many people are searching for an easy, effective way to block ads on every device, and Pi-hole offers exactly that – a smart, network-wide ad blocker that’s both powerful and surprisingly simple to set up.
This comprehensive guide will walk you step-by-step through installing Pi-hole, tailored especially for complete beginners. Drawing insights from official resources, community discussions, and the best existing documentation, this article breaks down the process, sheds light on what hardware you’ll need, how to deal with common router setups, and how to make sure every device (including your Pi-hole host) reaps the full benefits of ad-free browsing.
What is Pi-hole and Why Use It?
Pi-hole is an open-source software project that functions as a DNS-level ad blocker—essentially filtering unwanted content before it even reaches your devices. Because Pi-hole operates at your network’s DNS layer, it works for every device that connects to your WiFi, including mobile phones, smart TVs, gaming consoles, and more. You no longer need separate ad blockers for each device, and you’ll notice not just the disappearance of ads, but also improved browsing speeds and even increased privacy.
For more about the project, check out the official Pi-hole website.
What You Need To Get Started
Getting started with Pi-hole requires a small hardware investment, but you don’t need to be a tech expert. All you’ll need is:
- A device to run Pi-hole – A Raspberry Pi is the most popular option (any recent model), but you can also run Pi-hole on a spare PC, a virtual machine, an inexpensive single-board computer, or even a compatible NAS.
- A microSD card (if using a Raspberry Pi), for storing the operating system and Pi-hole software.
- Power supply and network connection (preferably Ethernet for stability).
- Basic peripherals for initial setup (monitor, keyboard, mouse), if your device doesn’t support headless configuration.
- Access to your router’s settings so you can configure it to use Pi-hole as the main DNS server. Not all ISPs or routers allow this, but we’ll cover alternatives.
Before you start, make sure your devices are ready and that you have a little time reserved: setting up Pi-hole is generally quick, but configuring your network may take a few extra minutes.
Different Ways to Install Pi-hole
Pi-hole’s official documentation highlights several installation methods, letting you choose the one best suited for your setup and level of comfort with command lines or Docker.
1. Automated One-Step Install (Recommended for Most Users)
This is the easiest option if you’re just getting started.
You simply run a single command in your terminal, and Pi-hole’s installer does the rest. This method is quick and works well for Raspberry Pi, most Linux distributions, and virtual machines.
The typical install command is:
curl -sSL https://install.pi-hole.net | bashThe installer will guide you through configuration options such as selecting your upstream DNS provider, network interface, and setting up a web dashboard password.
2. Manual Repository Clone
If you prefer to inspect what you’re running or want to tailor the process, clone the official Pi-hole repository and run the install script from there.
git clone --depth 1 https://github.com/pi-hole/pi-hole.git Pi-hole
cd "Pi-hole/automated install/"
bash basic-install.sh
This method gives you a bit more control and transparency over what’s being installed.
3. Installing via Docker
If you’re comfortable with containers or your network runs multiple services on a single machine, Docker is a great choice.
The Pi-hole team provides updated Docker images, so you can spin up your ad blocker with a single docker-compose file. Refer to the Pi-hole Docker documentation for up-to-date instructions and configurations.
Important Notes About Updates
Pi-hole is a rapidly evolving project, with frequent updates and improvements. Always start with the latest official documentation before beginning your installation to ensure you’re getting the most recent advice and advanced features.
Guiding You Through the Installation Process
The installation wizard will interactively prompt you for everything you need. Expect to:
- Choose your network interface (usually eth0 for wired devices).
- Select an upstream DNS provider (Google, OpenDNS, Cloudflare, or a custom one).
- Decide whether to block ads for both IPv4 and IPv6 connections.
- Configure an admin password for the web dashboard.
Let the installer finish, and you’ll have a working Pi-hole instance on your network. But installation is only half the journey – making your network use Pi-hole is the critical next step.
Configuring Your Network to Use Pi-hole For DNS
After installing Pi-hole, your devices will only benefit from ad blocking if their DNS queries go through your new Pi-hole server. This typically involves either modifying your router’s settings or manually configuring devices to use Pi-hole as their primary DNS.
Option 1: Set Pi-hole as DNS Server in Your Router
This is the recommended method, as it ensures every device joining your WiFi automatically takes advantage of Pi-hole’s filtering.
Steps to follow:
- Log in to your router’s admin interface. Usually, you can do this by navigating to 192.168.1.1 or 192.168.0.1 in your browser.
- Locate the DNS settings (often in LAN or DHCP options).
- Replace the existing DNS addresses with the IP address of your Pi-hole server for both IPv4 (and IPv6, if available).
- Save the settings and reboot your router if required.
Important: Not all routers allow manual DNS configuration, especially those supplied directly by ISPs. If your router is locked down or simply doesn’t provide this option, don’t worry—other solutions are available.
Option 2: Use Pi-hole’s Built-in DHCP Server
If your router won’t let you assign a custom DNS, Pi-hole can act as your network’s DHCP server itself. This means it will hand out IP addresses (and DNS settings) to every device on your network, ensuring they all use the ad blocker’s protection.
What to do:
- Disable DHCP functionality on your router (only if your network won’t break by doing so—it’s essential not to have two DHCP servers active at once).
- Enable Pi-hole’s DHCP server from its web dashboard under Settings > DHCP.
- Restart devices on your network so they obtain new settings from Pi-hole.
Option 3: Manual DNS Configuration on Each Device
As a last resort, you can manually set the DNS server on individual devices (laptops, smartphones, smart TVs) to point to your Pi-hole’s IP address. Instructions vary by operating system and device, but typically involve:
- Opening network or WiFi settings
- Selecting custom DNS and entering your Pi-hole’s address
- Restarting the device to apply changes
This is practical for a small network or particular devices, but can become tedious for larger households.
Making Your Pi-hole Host Use Its Own Filtering
Interestingly, the device running Pi-hole won’t automatically use itself for DNS lookups after installation. To fix this, you need to configure your Pi-hole host (be it a Raspberry Pi or other device) to use the Pi-hole’s IP address as its own DNS. For most Raspberry Pi and many Linux-based systems, if your OS uses dhcpcd for networking, add the following to /etc/dhcpcd.conf:
static domain_name_servers=127.0.0.1This ensures that all DNS queries generated by the Pi-hole device itself are filtered through the ad-blocker too.
Handling User Permissions and the Pi-hole CLI
From version 6 onwards, Pi-hole uses a new API for authentication, which applies to command-line interface (CLI) commands as well. If you set a password for API access, the CLI will prompt for it each time you run a command. However, there’s a handy workaround: you can add your local user to the ‘pihole’ group, which lets you skip entering the password every time.
Here’s how:
-
- For Debian, Ubuntu, Raspberry Pi OS, Armbian, Fedora, CentOS, and similar, add your user with:
sudo usermod -aG pihole yourusername- On Alpine Linux, use the appropriate group management commands.
You can toggle whether this convenience is enabled or not by setting webserver.api.cli_pw to false in Pi-hole’s configuration.
Helpful Resources and Where to Get Help
The official Pi-hole documentation provides detailed and up-to-date instructions for installation, updates, Docker deployment, and troubleshooting.
Additionally, online communities like the Pi-hole subreddit are excellent places to ask specific questions, browse common issues, and get feedback from other users. Many users on these forums start as complete beginners, so don’t be shy—it’s a great way to troubleshoot unique setups or clarify router-specific details.
Tips, Pitfalls, and Best Practices
- Be sure to keep your Pi-hole system up to date by regularly checking for new releases or security updates through the web dashboard or CLI.
- If you ever lose access to the web dashboard, you can reset your password via SSH with:
pihole -a -p - Monitor your network usage and blocked queries for a better understanding of which domains your devices are really communicating with. This transparency can help you troubleshoot unexpected blocks or whitelist legitimate services if needed.
- Consider enhancing your privacy and unblocking geo-restricted content by pairing Pi-hole with encrypted DNS services (like DNS-over-HTTPS or running Unbound).
Now that you have a deeper understanding of how Pi-hole works, why it is such an important upgrade for your network, and how to set it up from scratch, you only need a small investment in hardware and a willingness to explore your router’s configuration. As you become familiar with Pi-hole, you will enjoy not only ad-free browsing on all your devices, but also greater privacy and control over your digital life. For the latest features, guides, and more inspiration, visit the official Pi-hole website and feel free to join the online community for tips or technical support.