
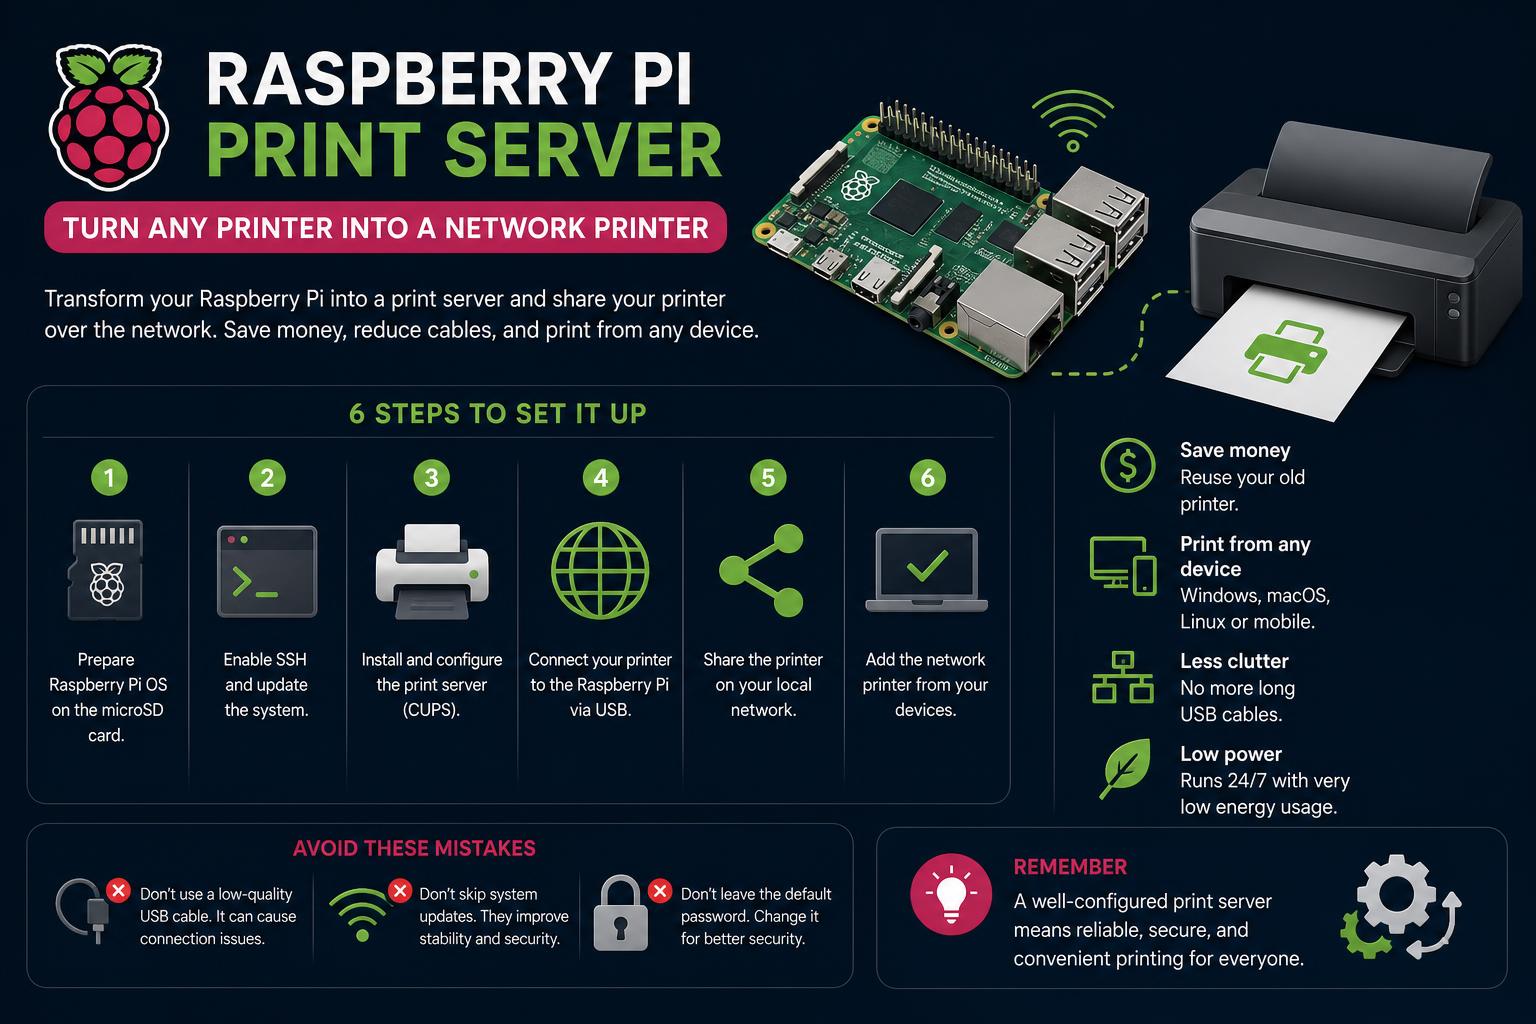
- A Raspberry Pi can efficiently revive and network-enable any USB printer, making it accessible to all devices at home or office.
- CUPS and Samba are essential for cross-platform printing, letting Windows, macOS, and Linux devices send print jobs seamlessly.
- Setting up security, user authentication, and maintenance tasks ensures a reliable and safe print server environment.
It’s a common scenario: you have a perfectly good printer sitting idle because it doesn’t support wireless networking, or it’s stuck near a desktop that nobody wants to keep running all day just to print something out from another room. Luckily, there is a clever and cost-saving solution: you can use a Raspberry Pi to transform nearly any USB or network printer into a shared, always-on network printer. This not only breathes new life into your printer, but it also provides modern, flexible access for all your devices—computers, laptops, and even smartphones.
In this complete guide, you’ll find everything you need to know to set up your own Raspberry Pi print server, from choosing hardware to handling configuration, boosting security, and troubleshooting common pitfalls. Whether you’re a home user tired of USB cable swapping, setting up a micro-office on a budget, or just love making your tech work harder for you, this is the walkthrough you’ve been searching for—with all the steps and details the top results gloss over.
Why Use a Raspberry Pi as a Print Server?
Turning a Raspberry Pi into a print server has quickly become a favorite DIY hack for tech enthusiasts and casual users alike. Here is why:
- Cost-effective: Old printers, especially USB-only models, can get a new lease on life without spending hundreds on a new wireless printer.
- Energy-efficient: Compared to running a desktop PC just for print sharing, the Raspberry Pi’s power draw is negligible.
- Space-saving: The little Pi (even a Pi Zero W!) can tuck away on a shelf or behind the printer and be forgotten.
- Universal access: The print server bridges platforms, so everything from Windows laptops to Linux machines and MacBooks can send jobs to a single shared printer.
What You’ll Need: Equipment & Prerequisites
Before you begin, make a quick list of your equipment:
- Raspberry Pi (any model with USB and reliable network or Wi-Fi support). (Check the latest guides on the official Raspberry Pi page.) For optimal performance, a Pi 2, 3, 4, or Zero W is recommended.
- Power supply suitable for your Pi model.
- microSD card, 8GB or larger, with the updated Raspberry Pi OS. For configuration steps, check the official Raspberry Pi documentation.
- USB or network printer. Verify that your printer is compatible; most are, especially with the right drivers.
- Ethernet cable or Wi-Fi (depending on support and the Pi’s location).
If you plan to run a headless setup, make sure to have SSH enabled on your Raspberry Pi to facilitate remote administration. Also, it is recommended to keep your system and all its packages updated before you begin.
Understanding the Software Stack: CUPS & Samba
The main work of the print server will be handled by two essential software components: CUPS and Samba.
- CUPS (Common Unix Printing System): This is the backbone of printing in Linux and Unix. CUPS manages all queues, filtering, and communication between your computer and the printer, supporting protocols like IPP (Internet Printing Protocol). It offers a powerful web management interface for easy configuration and monitoring. Windows, Linux, and macOS clients can send print jobs thanks to CUPS and its broad support for drivers and protocols. For more information, visit the CUPS project page.
- Samba: This software provides cross-platform compatibility, allowing your Pi’s printer to appear on Windows networks via SMB/CIFS. Proper SMB (Samba) configuration makes connecting from a PC very simple, even if drivers vary on each device.
Step-by-Step: Installing & Configuring the Raspberry Pi Print Server
1. Update Your Raspberry Pi System
To start correctly, update all packages:
sudo apt update
sudo apt upgrade
This prevents issues caused by outdated software.
2. Install CUPS, Printer Drivers, and Samba
Install CUPS and the necessary driver packages, plus Samba to facilitate network sharing:
sudo apt install cups printer-driver-gutenprint hplip samba
- printer-driver-gutenprint: Allows compatibility with non-HP printers (Canon, Epson, etc.).
- hplip: Offers advanced compatibility for HP printers.
3. Set User Permissions for CUPS Administration
To avoid running everything as root, add your user (usually “pi”) to the CUPS administration group:
sudo usermod -a -G lpadmin $USER
4. Allow Network Access to CUPS
By default, CUPS listens only on localhost. To manage and print from other devices, enable it on the network:
sudo cupsctl --remote-any
sudo systemctl restart cups
5. Find Your Raspberry Pi’s IP Address
If you are configuring from another machine, you will need the IP address:
hostname -I
6. Access the CUPS Web Interface
Access it with your web browser: http://<YOUR-RPI-IP>:631
Replace <YOUR-RPI-IP> with the actual address, for example 192.168.1.105:631.
7. Adding and Configuring Printers with CUPS
The CUPS interface makes configuration very easy:
- Click on Administration, select Add Printer. If it appears, choose your detected USB printer or enter the URI for network printers.
- Select the model; CUPS may detect it automatically or you can choose from a list. If your printer doesn’t appear, try a generic PostScript or PCL driver, or provide a PPD file from the manufacturer or OpenPrinting.
- Assign a name, define its location/information and, very importantly, check Share This Printer so it is accessible across the network.
- Review and adjust the default options (paper size, print quality, etc.). Run a test print to confirm.
Fine-tuning Windows Access: Configuring Samba
For easy integration with Windows PCs, configure Samba on your Raspberry Pi:
- If it’s not installed, run:
sudo apt install samba - Edit the Samba configuration file:
sudo nano /etc/samba/smb.conf - Look for the
[printers]and[print$]sections and adjust as follows:
[printers]
   comment = All Printers
   browseable = yes
   path = /var/spool/samba
   printable = yes
   guest ok = yes
   read only = yes
   create mask = 0700

[print$]
   comment = Printer Drivers
   path = /var/lib/samba/printers
   browseable = yes
   read only = no
   guest ok = no
Save the changes (Ctrl+O, Enter, Ctrl+X in nano), and restart Samba:
sudo systemctl restart smbd
Optional: Restrict Access & Set Up User Authentication
By default, Samba shares with guests. For greater control, configure access by:
- Adding valid users:
valid users = @printusers
- Creating a user group:
sudo groupadd printusers
sudo usermod -aG printusers pi
- Assigning Samba passwords:
sudo smbpasswd -a pi
- Restart Samba to apply the changes.
Connecting Client Devices
- Windows: Open “Printers & Scanners,” click “Add Printer,” and select your Raspberry Pi’s network printer, which will appear with the server name or IP. If prompted, enter the credentials you configured or use guest access if enabled.
- macOS: In System Preferences → Printers & Scanners, select to add a printer via IP, using IPP and entering the Pi’s details.
- Linux: Use the system’s printer configuration tool or the
lpadmincommand pointing to the Pi’s CUPS server. - Mobile devices: Some third-party apps or features like AirPrint (if configured) will allow you to print directly from phones or tablets once the server is online.
Troubleshooting Common Print Server Issues
It is common to run into difficulties the first time. Here are some common problems and solutions:
- Printer not detected: Run
lsusbto verify that it detects the printer, or try pinging the device’s IP. Check cables and power. - Incorrect or missing driver: Make sure to use the correct PPD. Visit the manufacturer’s website or OpenPrinting for specific models.
- Permission issues: If a user cannot add or use printers, verify that they are in the
lpadmingroup and in the configured Samba groups. - Network doesn’t detect the printer: Confirm that the CUPS and Samba services are active and listening correctly. Restart both if necessary:
sudo systemctl restart cups
sudo systemctl restart smbd
- Cannot print from mobile: Check if the phone supports advanced printing, or use an app compatible with IPP or AirPrint (if you configured it).
- Logs and diagnostics: Check the
/var/log/cups/error_logand/var/log/samba/files to find errors.
Enhancing Security and Reliability
If your print server will be on a public or corporate network, prioritize security to protect your data and prevent unauthorized jobs.
- Restrict access: Configure the rules in
/etc/cups/cupsd.confand/etc/samba/smb.confto limit authorized IPs or users. - User authentication: Use
smbpasswdand control who can access. - Keep the software updated: Regularly update the Raspberry Pi OS and packages to close vulnerabilities.
- Firewall: Activate UFW or another firewall to block unnecessary ports.
- Backups: Keep copies of your configurations in
/etc/cups/after major changes. - Periodic maintenance: Check logs and disk space to prevent bottlenecks in the printing system.
Essential Tips and Real-World Stories
This method isn’t just for tech experts. Many regular users have successfully set up a Raspberry Pi print server, sometimes in less than an hour, with no previous experience.
One popular story on Reddit tells of how a user repurposed their old Epson printer and a Pi Zero W to create a hassle-free server for their entire house. With just a few commands and a simple setup in the CUPS interface, they managed to send print jobs from their laptop, phone, or even tablet. No advanced technical experience was needed, and they got much more use out of their printer.
If you are intimidated by using the command line, remember that most options in CUPS and Samba are also available through their graphical or web interface. Take your time, pay attention to error messages, and don’t worry—there is a large community ready to help you.
Going Beyond: Saving Money and the Planet
Every old printer you revive with a Raspberry Pi not only saves money but also keeps perfectly good electronics out of the landfill. A Pi consumes far less power and has a smaller environmental impact than keeping a PC running just to print. For homes, families, or small businesses, this can mean years of reliable printing at a very low cost.
For those who want to expand, it’s worth connecting multiple printers, setting up print quotas, or diving into advanced CUPS configurations—the possibilities grow quickly.
Building a print server with a Raspberry Pi is a cheap, fun, and practical project that improves your daily routine. It adds flexibility, cuts expenses, and helps protect the environment. With updated steps, best practices, and a little troubleshooting know-how, you will be able to share any printer in your home, office, or studio without technical hassles, without reorganizing space, and without worrying about compatibility from laptops, phones, and other devices.