
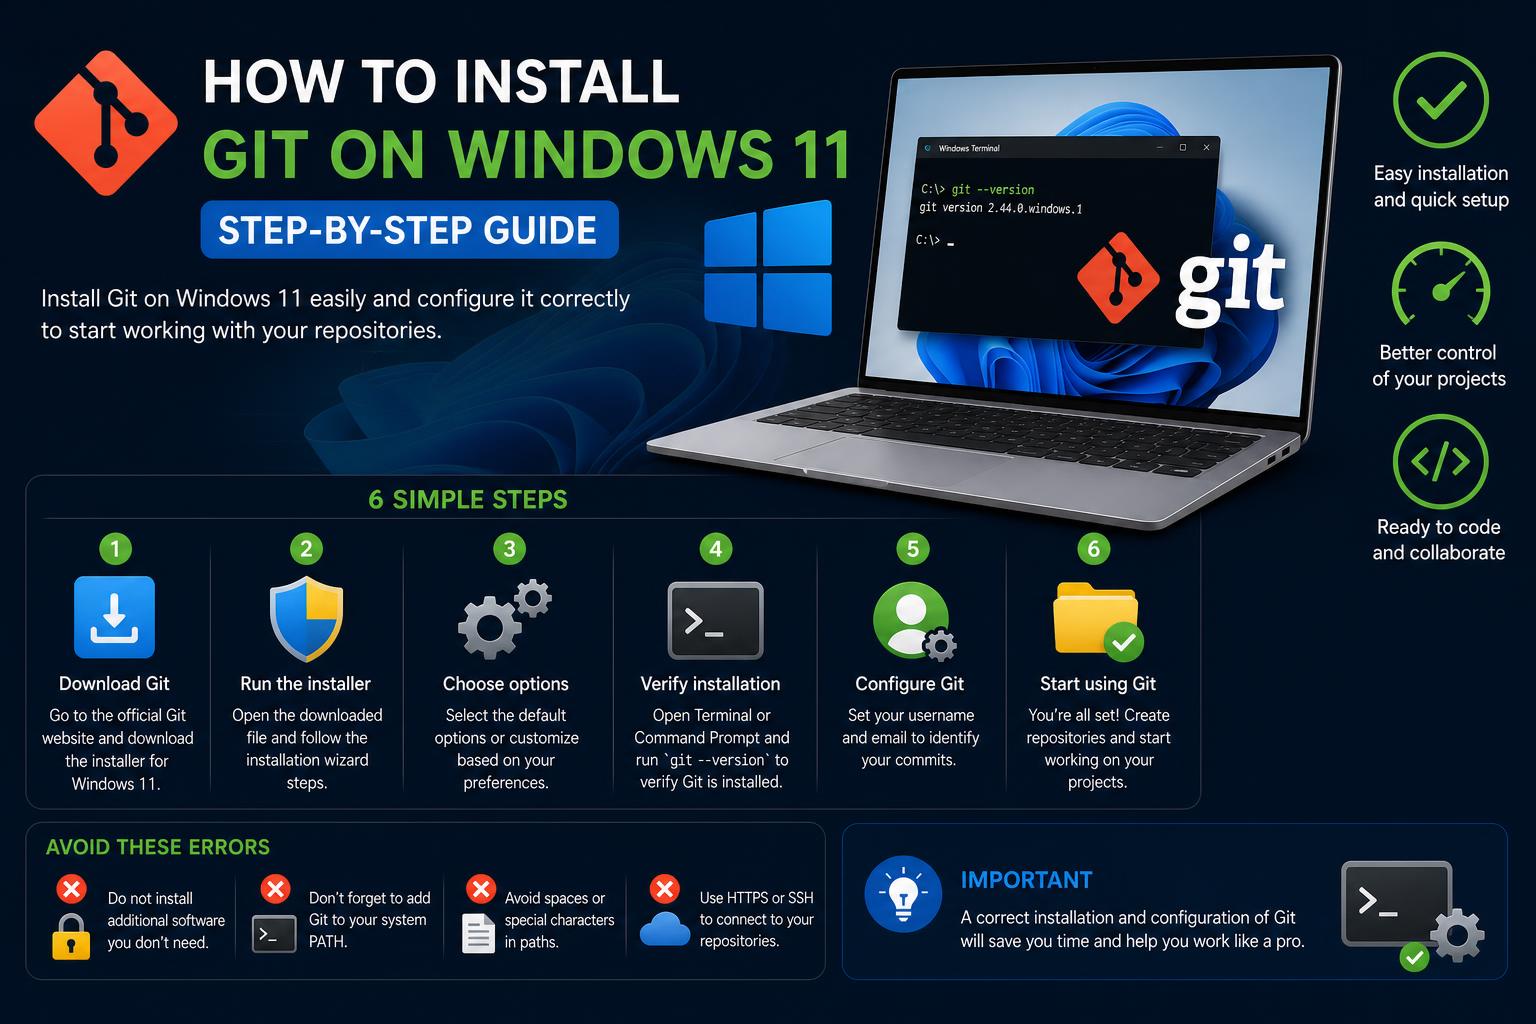
- Git for Windows offers both GUI and command-line tools, including secure credential management for seamless integration with services like GitHub or Azure.
- Official installation is recommended via git-scm.com, but alternative command-line setups (winget, Chocolatey) are available for automated users, though may lag behind.
- Proper post-installation configuration, including user identity and integration with editors like VS Code, is essential for efficient version control workflows.
Learning how to install Git on Windows 11 can be confusing, especially with so many different resources online. For both beginners starting their development journey and experienced professionals needing to set up a fresh system, finding up-to-date, clear guidance is critical. This article will walk you through every essential detail about installing and configuring Git on Windows 11, highlighting various installation methods supported by the official Git project and popular package managers.
We’ll also cover how Git integrates with graphical user interfaces, credential management, and other important features that shape your daily work with version control. Whether you use the command prompt, PowerShell, or prefer a GUI, you’ll have a smooth experience following the explanations and steps found here.
Why Git? Understanding Its Importance on Windows 11
Git is a fast, free, and open-source distributed version control system—meaning it handles everything from individual files to very large codebases with efficiency and speed. It is an essential tool for developers collaborating on projects, whether you work alone or in large teams. On Windows 11, Git bridges the gap between environments like UNIX/Linux and your desktop, allowing seamless contribution to open source or private repositories directly from your PC. You can learn more about the project itself by visiting the official Git website.
Git for Windows: More than a Simple Installer
While Git is built around the command line, the Git for Windows project provides native Windows installations, including tools tailored for the Windows ecosystem. This package delivers:
- A BASH emulation, allowing you to run Git commands as if you were using Linux or UNIX
- A powerful Git GUI for those who prefer graphical user interfaces
- Shell integration—just right-click in Windows Explorer to access Git functionality
- Secure credential management for working with different hosting services
This makes Git for Windows a great solution for both newcomers and advanced users, offering flexibility and familiar interfaces. For more information, check out Git for Windows.
Checking if Git is Already Installed
Before installing, it’s smart to see if Git is already on your system. Open your Windows Command Prompt or PowerShell, and type:
git --versionIf you see the current version displayed—congratulations, you already have Git! If an error appears, or you get a message that ‘git’ is not recognized, it’s time to install.
Official Installation: Direct Download from git-scm.com
The safest and most recommended place to download Git for Windows is the official source at . Here you will always find the latest stable build, complete with security updates and features:
- Visit https://git-scm.com/download/win. The download should start automatically for the installer suited to your system.
- Choose the proper version depending on your hardware—typically x64 (for most modern PCs) or ARM64, if you use specialty hardware.
The direct installer is the best way to get the official and up-to-date Git binaries on Windows 11.
It is usually named something like Git-<version>-64-bit.exe.
Standalone vs. Portable Installations
The Git for Windows project offers several download options for different needs:
- Standalone Installer: A standard setup file installing Git system-wide, making it available in the Windows environment (Command Prompt, PowerShell, etc.) This is the recommended installation for most users.
- Portable Edition: A version designed to run from USB drives without needing system installation—handy for moving between machines or environments.
Both x64 and ARM64 versions exist for each method. Select your preferred format before downloading to ensure compatibility and convenience.
Installation Process Step-by-Step
- Download the Installer: Head to and grab the appropriate installer for your architecture (usually x64).
- Launch the Installer: Double-click the downloaded file to begin installation.
- Follow the Git Setup Wizard: The setup wizard will guide you through a series of options. For beginners, accepting the default settings is usually best. These defaults are designed to fit most needs while ensuring compatibility with Windows 11.
- Choose Additional Components: You’ll have options like installing ‘Git Bash’, ‘Git GUI’, integrating with Windows Explorer context menus, and configuring credential management. Unless you have specific needs, keep the recommended defaults.
- Complete the Installation: After confirming your selections, the installer will finish copying files—it only takes a few moments. Once done, you’ll see Git added to your system path, making it accessible from PowerShell, Command Prompt, and the Git Bash shell.
- Verify the Installation: Open Command Prompt, PowerShell, or Git Bash and type
git --versionto confirm everything worked.
If you encounter any issues, consult the help at or official documentation for troubleshooting advice.
Alternative Installation Methods
Using Windows Package Managers
For users who prefer command-line package management, Windows offers two popular options: winget and Chocolatey.
- winget: The official Windows Package Manager.
- Chocolatey: A widely-used third-party package manager for Windows.
Installing Git Using winget
windows 11 comes pre-installed with winget on many systems. If not, you can find it via the Microsoft Store or official documentation. Once you have winget, open Command Prompt or PowerShell and run:
winget install --id Git.Git -e --source wingetNote: While this method is convenient, the Git.Git package is not maintained by the Git for Windows project. It may lag behind the very latest version found on git-scm.com.
Installing Git Using Chocolatey
If you use Chocolatey (choco), it’s just as easy. First, install Chocolatey if it’s not already on your system (instructions available on the Chocolatey website), then open your terminal and type:
choco install gitAgain, this Chocolatey package is not officially maintained by the Git for Windows developers, which means it might diverge from the latest stable Git updates.
Updating Git on Windows 11
Keeping your Git installation up to date is crucial for security and feature access. Unfortunately, Git for Windows does not update itself automatically. To update:
- Download the latest installer from .
- Run the new installer. It will replace the existing version while keeping your configuration intact.
There’s no need to uninstall previous versions—just update directly with the new executable.
Configuring Git After Installation
Once installed, Git isn’t ready to use out of the box for pushing code to online platforms like GitHub, Azure, or GitLab. You need to set up your identity to attribute commits correctly:
git config --global user.name "Your Name"
git config --global user.email "[email protected]"
These settings store your personal information in Git’s configuration, tagging all future changes accordingly. You can re-run these commands any time to update your details.
Working with GUIs: Git Bash, Git GUI, and Shell Integration
For many, command-line tools can be intimidating. The Git for Windows project includes:
- Git Bash: A Linux-style BASH terminal packaged with Git. Ideal for users switching from UNIX, or anyone preferring a consistent terminal experience.
- Git GUI: A graphical application offering a visual way to work with repositories. You can commit, resolve conflicts, and visualize branches without touching the command line.
- Shell Integration: Right-click any folder in Windows Explorer to open it directly in Git Bash or the Git GUI—making it easy to initiate repositories right where you need them.
Having both BASH and GUI options ensures flexibility and ease of access for users of all experience levels.
Secure Credential Storage and Integrations
Authenticating with GitHub, Azure DevOps, or other remote repositories requires proper credential management. Git for Windows includes the Git Credential Manager, enabling secure, cross-platform storage of credentials with seamless integration for GitHub and Azure:
- On first push or pull from a new remote, you will be prompted to login with your preferred provider.
- Credentials are stored securely, reducing the need to enter passwords every time you interact with a remote repository.
This streamlines the workflow for developers working across multiple hosts and teams.
Working with GitHub: Installation, Verification, and Integration
For those using GitHub, there are additional options:
- GitHub Desktop installs the latest version of Git as part of its setup. This bundled installation brings an intuitive GUI and full command-line support, perfect for beginners and those wanting a point-and-click experience.
- After installation, you’ll find the command-line version of Git available, as well as robust integration with GitHub repositories (pull requests, issues, and more).
To check if Git is properly installed, open the Command Prompt or Git Bash, and type:
git --versionThis command will confirm your installation and show the exact version running on your system.
Cloning Repositories and Working with VS Code
Modern editors like Visual Studio Code offer deep Git integration. After setting up Git, you can use features like “Git: Clone” or the Source Control view to access your repositories directly from the editor. To connect with GitHub, install the “GitHub Pull Requests and Issues” extension, sign into your GitHub account, and start collaborating with just a few clicks.
The process looks like this:
- Open VS Code
- Press Ctrl+Shift+P and select “Git: Clone”
- Paste your repository URL, choose a local directory, and start coding right away!
Extensions for other platforms work similarly, integrating authentication and collaboration tools to streamline your workflow.
Advanced Configuration and Customization
The flexibility of Git allows deep customization:
- Global Configurations: Besides user name and email, you can configure line endings, preferred editor, and merge/diff tools. Try
git config --global core.editor "code --wait"to use VS Code as your default editor. - Alias Shortcuts: Simplify commands with aliases in your global config (e.g.,
git config --global alias.co checkout).
For a full list of configuration options, run git config --help or consult the official documentation.
Troubleshooting Installations, Updates, and Common Errors
Installation errors do pop up from time to time. Here are the top issues and quick fixes:
- If ‘git’ is not recognized as a command, ensure it’s added to your system path during installation.
- Mismatched versions? Download and re-run the latest installer from .
- Issues with winget or Chocolatey installations? Check their official documentation or update their database with
winget upgrade --allorchoco upgrade all. - If you have conflicting configurations, reset to default with
git config --global --unset-allfor specific settings.
If you encounter advanced issues, community help is available at official guides, documentation, and the numerous forums supporting developers worldwide.
Special Situations: Portable Usage & Advanced Builds
For users needing portability (e.g., working from multiple machines or temporary setups), the portable Git for Windows package provides flexibility without modifying your system. Simply download the portable version, extract to your USB stick or drive, and run.
If you want to experiment with even newer versions, advanced users can build Git from source, though this is not typically required for everyday use. The provides resources and guides for these cases.
Setting up Git on Windows 11 is a straight-forward process when following the right steps, and the available tools—installer, BASH shell, GUI, credential manager, and the support for package managers—make it much easier than ever before. Whether you prefer clicking through graphical menus or running commands in the terminal, Windows 11 provides all the flexibility, security, and power needed for productive development with Git. Stay current by updating frequently, explore integration options with your favorite editors and platforms, and don’t forget to configure personal settings for effective collaboration and code management—your future self and teammates will thank you!