
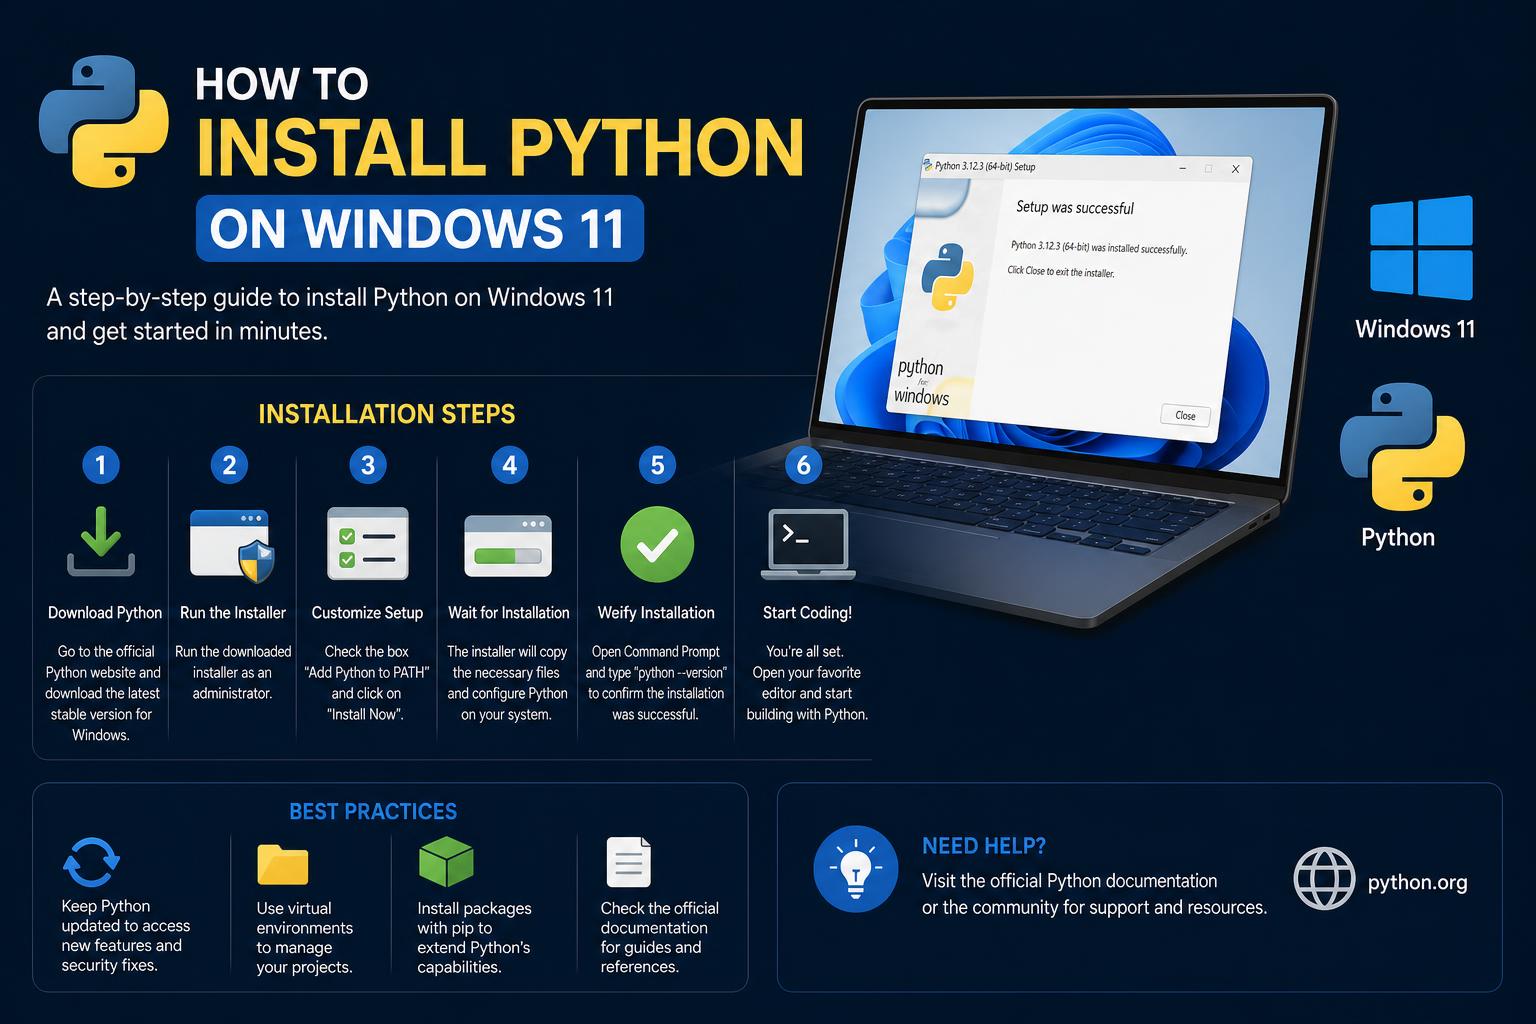
- Choose the official Python.org installer for the most reliable setup and easier troubleshooting on Windows 11.
- Always check the "Add Python to PATH" option during installation to ensure the interpreter is recognized system-wide.
- Virtual environments help to keep project dependencies organized and avoid system conflicts.
If you’re looking to start coding or running Python applications on your Windows 11 PC, you’re in the right place. Setting up Python on Windows 11 can seem tricky if you haven’t done it before, especially with various download options, PATH settings, and the occasional hiccup involving app execution and multiple Python versions. Whether you’re developing graphical applications, running scripts, or exploring data science, this guide will walk you through every step, based on the very latest insights and common issues experienced by the community.
Below, you’ll find a carefully detailed walkthrough for installing Python on Windows 11, verifying your setup, handling the most common errors and roadblocks, and understanding the different ways Python can be installed. We’ll also discuss the differences between installer sources and versions, and give tips from other users’ experiences so your setup is efficient from the start.
Understanding Python on Windows 11: Quick Overview
First, let’s clarify a couple of things about running Python on Windows. Python is a free, open-source programming language that’s officially distributed at python.org. On Windows 11, you can install Python through different channels: the official Python.org installer, the Microsoft Store, or via package managers and specialized tools if you need more advanced setup features.
For most users and especially beginners, the best route is to download the official Windows installer from Python.org. This method gives you access to the latest stable release, ensures all features are available, and avoids compatibility quirks that sometimes occur with the Microsoft Store version.
Step 1: Downloading Python for Windows 11
- Visit the official Python Downloads page: Go to Python.org/downloads. This site always features the most recent stable Python releases for Windows.
- Choose the correct installer: For modern computers, select the Windows Installer (64-bit) option. Unless you have a specific need for a 32-bit version (for legacy compatibility), stick to 64-bit.
Tip: There are alternative installers available, such as through the Microsoft Store or with tools like Python Install Manager. However, these are generally only recommended for certain scenarios (like enterprise deployment) or specific compatibility needs. Using the official installer avoids accidental stub installations and future conflicts.
Step 2: Running the Python Installer Effectively
Once you’ve downloaded the installer (a file ending in .exe), locate it in your Downloads folder and double-click to start. The installer will begin by presenting you with several install options. Here are the key points to watch for:
- Check “Add Python.exe to PATH” before clicking anything else! This critical step allows you to type
pythonfrom any command prompt or terminal window. If you skip this, using Python later will be much harder. - Click “Install Now” unless you have advanced needs. This default installs Python with all standard libraries and tools (including Tcl/Tk for GUIs and pip for packages).
During installation, the wizard will create necessary folders, update your PATH, and configure everything for immediate use. After you’ve clicked Install, progress bars will indicate how things are going. When it’s all finished, click Exit.
Step 3: Verifying Your Python Installation
Checking your install is very straightforward:
- Open the Windows Start Menu and type cmd, then hit Enter to launch the Command Prompt.
- Type
pythonand press Enter.
If everything is correct, you’ll see a line with your installed Python version (e.g., Python 3.12.2) and the >>> prompt. This interactive interpreter (REPL) lets you execute Python commands instantly.
If you see an error like 'python' is not recognized, there may have been an issue with your PATH settings. See the troubleshooting section below for solutions!
Troubleshooting Common Installation Issues
Here are the most common installation problems reported by Windows 11 users (and how to fix them):
- Typing
pythonopens the Microsoft Store instead of launching the interpreter.
Windows 10 and 11 sometimes treat executable aliases for Python as app store stubs.
To fix: Go to Settings → Apps → Advanced app execution aliases and disable or untick the entries forpython.exeandpython3.exe. Try your Command Prompt again afterwards. - ‘python’ is not recognized as an internal or external command
This usually means Python wasn’t added to your system PATH.
To fix: Re-run the Python installer, choose Modify, and ensure that “Add python.exe to PATH” is checked. Complete the installer steps as before. - Multiple versions of Python causing issues
Some users find that after several installs (or after using the Microsoft Store and the official installer), Python gets messy with multiple versions.
To fix: Uninstall all Python versions via Control Panel → Programs & Features, then perform a clean install using just one version. Always stick to installations from trusted sources like python.org unless you absolutely need a secondary install. - Global versus User Package Issues
Problems can arise when packages are installed globally (system-wide) versus as a user. Use a virtual environment for project-specific dependencies, which keeps your project isolated and manageable:- Navigate to your project folder in the command prompt
- Run
python -m venv myenv(replace “myenv” with your chosen environment name) - Activate with
myenv\Scripts\activateon Windows
Python Distribution Options for Windows
You might notice that in addition to the official Python.org installer, alternative sources of Python are available. Each has specific pros and cons:
- Microsoft Store App: Quick to install and easy for basic use. However, it occasionally causes problems with PATH setup and is not suitable for advanced uses or professional development. It may also be a limited feature set.
- Python Install Manager: Found on the Microsoft Store, intended to help manage Python versions. Not commonly needed unless you’re juggling multiple Python installations for different projects or organizational requirements.
- Using WSL2 or Docker: Recommended for advanced developers or if you want a Linux-like development environment on Windows. WSL2 (Windows Subsystem for Linux) lets you install and run a complete Linux environment on Windows, which is great for development and isolation. Docker is ideal if you need totally isolated, reproducible environments or are working on collaborative, cross-platform projects.
Most everyday users, especially those new to Python, will have the smoothest experience using the official standalone Windows installer from Python.org. Only use Windows Store or third-party tools if you have a specific need.
Tips from Experienced Windows Python Users
There’s no substitute for advice from programmers who’ve already tackled Windows setups. Community wisdom highlights a few real-world points:
Having multiple Python versions installed can cause a mess, especially when PATH variables, the Windows Store stub, and various package installs overlap. Stick with one recent release from Python.org whenever possible, and avoid installing Python from the Store unless you absolutely know what you’re doing.
If you’re planning to do anything advanced (like GUI app development, machine learning, or running separate projects), get in the practice of creating “virtual environments” for each project. This keeps your dependencies tidy and avoids package conflicts.
If your workplace dictates a particular setup (for example, they require Python via the Store or in a managed environment), follow your employer’s guidelines rather than risking unsupported configurations.
Installing Python GUI Libraries on Windows 11
Once Python is installed and working, you may want to create desktop apps with graphical interfaces.
Popular GUI libraries for Python include:
- PyQt/PySide: Modern tools for advanced and cross-platform GUI apps.
- Tkinter: The built-in option for quick and easy (though basic) interfaces.
Package installation with pip is usually enough for most GUI libraries: run pip install pyqt5, pip install pyside6, or pip install tk (Tkinter is usually included with the standard Python.org installer, so you may not need to install it separately).
If you encounter errors about missing modules or dependencies when trying to use GUI libraries, double-check which Python version you’re running and that your virtual environment (if you’re using one) is active.
Installing Python on Windows 11 is straightforward once you know the steps. The official Python.org installer is the most reliable way to get started, ensuring compatibility and minimizing future headaches with PATH and package management. With careful installation, proper confirmation, and attention to tips from experienced users—including the use of virtual environments—you can set up a professional, flexible Python development environment quickly and smoothly. Troubleshooting common installation bumps and understanding the pros and cons of distribution sources will make your Python journey on Windows hassle-free and enjoyable.