
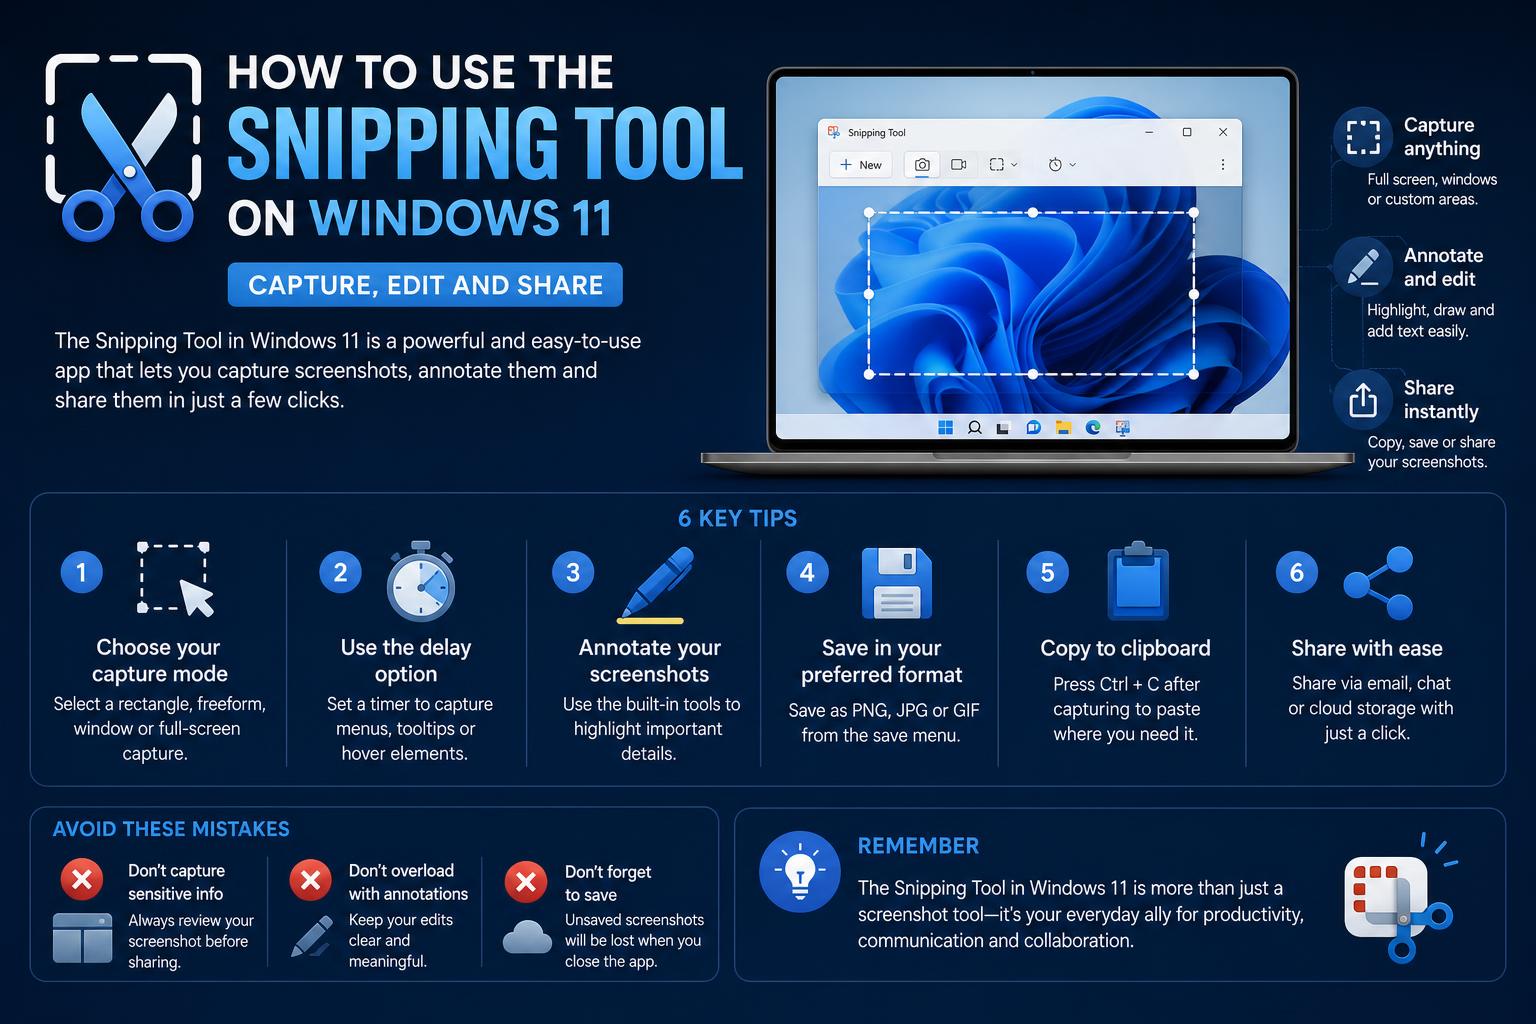
- Windows 11's Snipping Tool features comprehensive screenshot and video capture options with advanced AI-powered tools.
- Efficient keyboard shortcuts and built-in editing simplify the entire snip workflow, including annotation, color picking, and text extraction.
- Troubleshooting, customization, and sharing options ensure users can tailor the experience to any workflow or troubleshoot common upgrade issues.
Taking screenshots in Windows has never been easier than with the Snipping Tool in Windows 11. This built-in tool not only lets you capture portions of your screen with precision, but it also offers a ton of features for editing, sharing, and organizing your screenshots—and now, with features like video capture, AI-powered cropping, and text extraction, it’s more powerful than ever.
If you’ve recently upgraded to Windows 11 and feel lost without the familiar screenshot shortcuts (or you’re just looking to master the new Snipping Tool), you’re in the right place. This guide will break down everything, from basic snips to advanced tips that take advantage of the latest features, all explained in a friendly, conversational tone for beginners and enthusiasts alike.
What Is the Snipping Tool in Windows 11?
The Snipping Tool is Microsoft’s integrated screenshot application, providing a one-stop shop for all your screen capture needs on Windows 11. Unlike older versions or third-party programs, the modern tool blends both image and video snips, annotation capabilities, and even AI-driven enhancements—all without any extra installations or hidden costs.
Windows 11’s Snipping Tool has been completely revamped to merge classic snipping functionality with the newer Screen Sketch experience, so whether you miss the old days or crave the new, you’ve got the best of both worlds in one tidy app.
Why Choose the Snipping Tool Over Other Screenshot Tools?
- It’s already installed—there’s no need to download extra software or worry about compatibility.
- It’s free and regularly updated with new features from Microsoft.
- It integrates right into the operating system, making it accessible with keyboard shortcuts and quick search.
- It combines both still image and video snipping, offering flexibility for different tasks.
The days of switching between third-party tools or missing out on simple snip functionality are gone; everything’s baked right into Windows 11.
How to Launch the Snipping Tool in Windows 11
Launching the Snipping Tool is insanely easy, and you have a few ways to do it, depending on what feels natural to you.
- Keyboard Shortcut: Press Windows logo key + Shift + S. This brings up the Snipping Tool overlay and lets you choose your snip right away.
- Search in Start Menu: Click Start, type snipping tool, then launch the app from results.
- Pin for Quick Access: Right-click the Snipping Tool app from your search results and pick Pin to taskbar for future one-click access.
- Print Screen Button: By default, pressing PrtSc still captures your entire screen to the clipboard, but you can tweak settings so it opens the Snipping Tool overlay instead.
Pro tip: If you’re a heavy user, pinning the tool or assigning your Print Screen button to open the Snipping Tool overlay saves loads of time.
Types of Snips: Mastering Screen Captures
There’s more to capturing your screen than just snapping a rectangle! Windows 11’s Snipping Tool supports multiple modes for ultimate flexibility:
- Rectangular Snip: Click and drag to capture an area in any rectangular shape.
- Window Snip: Grab a screenshot of a specific window (like a dialog box or open program) with a single click.
- Full-screen Snip: Instantly capture everything visible on your monitor.
- Freeform Snip: Use your mouse or touchscreen to draw a custom snip around any shape—perfect for odd-shaped elements.
- Video Snip: (New!) Record the action of a selected area as a video rather than just a static image. Super for tutorials, bug reporting, or showing mouse movements.
Every mode gives you a greyed-out overlay so you can see exactly what you’re capturing before confirming your snip.
Keyboard Shortcuts for Power Users
If you live and breathe efficiency, Snipping Tool’s keyboard shortcuts will be your best friend. Here’s a quick rundown of what you can do:
- Windows + Shift + S: Start image snip overlay.
- Windows + Shift + R: Start video capture overlay.
- Alt + M: Choose a snipping mode.
- Alt + N: Start a new snip using your last selected mode.
- Ctrl + S: Save your snip right away.
- Ctrl + C: Copy your snip to the clipboard for quick pasting.
- Alt + D: Trigger a delayed snip (by up to 5 seconds!)
- Shift + Arrow Keys: Tweak your snip selection with keyboard precision.
Combined with Windows’ notification system, you can literally snap, annotate, and share in seconds—no mouse required if you don’t want it.
Advanced Features in Windows 11
Snipping Tool is no longer just a simple screenshot utility. The latest updates have packed in some seriously cool features:
AI-Powered “Perfect Screenshot”
Exclusive to Copilot+ PCs and Windows Insider builds (for now), this wizardry auto-detects and frames the most relevant on-screen content, so you don’t have to fuss with cropping after snipping. No more missing the edge of a window or capturing too much background—just smart, clean captures.
Integrated Color Picker
Now you can grab precise HEX, RGB, or HSL color values from any pixel on your screen. If you’re a designer or frequently need to reference colors for branding or presentations, this single feature eliminates the need for any third-party apps.
Text Extraction (OCR)
Extract text straight from your screenshots or snipped videos thanks to Optical Character Recognition. Clicking the Text actions button pulls out printable, editable text, and you have options to quickly copy it, copy all at once, or even redact emails/phone numbers right from within the snipped image. Nifty if you need to quote, share, or redact sensitive info on the fly!
Video Recording and Snip Editing
Capturing a Video Snip
With the Snipping Tool open:
- Click the Record button, then New.
- Select the screen area to record—just like taking a rectangular snip, but this time it’s filming the action.
- Choose whether you want to record with system sounds and/or your microphone. This is awesome for creating tutorials or documenting a bug for support.
- Click Start to begin and Stop when you’re finished. The video is saved, and you can edit it further in Clipchamp, Microsoft’s video editor.
Note that editing within the Snipping Tool itself is basic—trim videos or add advanced effects in Clipchamp for best results.
Editing Your Snips
Once you capture an image snip, it pops up in the Snipping Tool window with several handy tools:
- Pen and Highlighter: Draw or emphasize directly over your snip, with a selection of colors.
- Eraser: Oops? Erase any doodles or annotations you don’t want.
- Shapes & Emojis: Drop in rectangles, circles, arrows, and even a few select emojis to make your message clear.
- Crop: Refine the captured area if you only want to keep a specific part.
- Edit in Paint: Need more? One click sends your snip to the Paint app, where you can add images, overlay text, or go wild.
- Copy or Save: Ready to paste into an email or document? Hit copy. Want to file it for later? Save it in the format/file name of your choice—and you can control default save behaviors in Settings.
Every time you make a new snip, a notification will appear—clicking it opens the snip for further editing instantly.
Managing and Sharing Your Snips
Snipping doesn’t end with capture and edit—you’ve got easy sharing options directly from the app.
- Share Button: Opens the Windows share menu so you can send your snip via email, social apps, or even directly to Teams if you’re using it for work.
- Send to Email: You can set up Gmail, Outlook, or another service as your default handler for email (“mailto” links), so clicking Share > Email fires up your chosen platform with the snip attached or in the body.
- Clipboard Integration: Many actions copy the snip straight to your clipboard, so you can immediately paste into Word, PowerPoint, OneNote, or wherever else you’re working.
For advanced users: Pin the Snipping Tool to your taskbar and tweak the Snipping Tool’s settings (via the three dots or the Settings gear) to control save locations, auto-save behaviors, or even add borders by default.
Extra Tweaks and Fixes (If Snipping Tool Is Missing or Misbehaving)
If you can’t find the Snipping Tool after upgrading or it’s giving you trouble, here’s what you can do:
- Repair or Reset: Go to Settings > Apps > Installed Apps, find the Snipping Tool, then choose Advanced Options and click Repair or Reset. This often solves minor glitches or missing features.
- Uninstall/Reinstall: Open Windows PowerShell as admin, run Get-AppxPackage *Microsoft.ScreenSketch* | Remove-AppxPackage. After that, download it again from the Microsoft Store page and reinstall.
- Update via Store: Make sure you’re running the latest version, as Microsoft pushes new functionality (like video and AI features) through Store updates, not just Windows updates.
- Default Settings: If snips are not automatically saving to your Screenshots folder, check Snipping Tool settings to adjust the save location, or enable auto-save/copy as you prefer.
Most issues can be fixed with these steps, restoring full functionality of the app.
Snipping Tool Settings You Should Know
Optimize your workflow by customizing these options in the Snipping Tool:
- Auto-Save: Decide whether every snip is auto-saved or if you prefer to save manually.
- Save Location: Choose the default folder for your captures or change it as needed.
- Add Borders: Enable automatic borders for more distinct snips, especially useful for presentations.
- Delayed Capture: Set a countdown (1-5 seconds) to prepare your screen before capturing.
- Notifications: Turn on notifications to get prompted to edit or share right after capturing.
Tips and Tricks for Getting the Most Out of Snipping Tool
Once you’re familiar with the basics, these advanced tips will help you work even more efficiently:
- Use Text Actions for OCR: Extract and redact text from snips quickly—great for sanitizing screenshots before sharing.
- Switch Modes with Shortcuts: Toggling between video and image modes via shortcuts saves time during tutorials or quick edits.
- Edit in Paint for Advanced Markups: For detailed annotations, open snips directly in Paint.
- Leverage AI Features: Features like “Perfect Screenshot” and content-aware cropping can automate crop and framing tasks.
- Use the Color Picker for Consistency: Perfect for matching colors in designs, UIs, or branding materials.
Troubleshooting: Common Issues and User Feedback
Some users report frustrations with Windows 11’s Snipping Tool, especially if accustomed to older shortcuts or missing features after updates. Others experience issues with missing tools or slow performance. Microsoft’s updates bring new capabilities but may require users to adapt. For smoother workflows, customize defaults and rely on the Windows+Shift+S shortcut for quick captures.
Most problems can be resolved by updating, reinstalling, or repairing the app, ensuring you have access to all the latest features and fixes. Third-party alternatives still exist, but Windows’ integrated tool covers most needs effectively once configured properly.
Best Practices and Real-World Use Cases
The Snipping Tool is a versatile utility for enhancing productivity, communication, and creative projects:
- Business Presentations: Capture, annotate, and add callouts for reports or meetings.
- Educational Tutorials: Record process videos or highlight lesson content.
- Personal Projects: Collect ideas, snippets of code, or UI designs with color references.
- Quick Sharing: Paste directly into emails, chats, or collaboration tools for faster communication.
Accessibility is also supported, with keyboard navigation and compatibility for users with different needs.
Windows 11’s Snipping Tool now functions as an all-in-one visual communication hub, offering seamless annotation, video recording, AI enhancements, and sharing capabilities—all integrated into a user-friendly experience without extra installation. Exploring its various features and configuring the settings to fit your workflow can turn it into a powerful tool for both casual and professional use. Always check the Microsoft Support page or the Microsoft Store for updates and official downloads.