
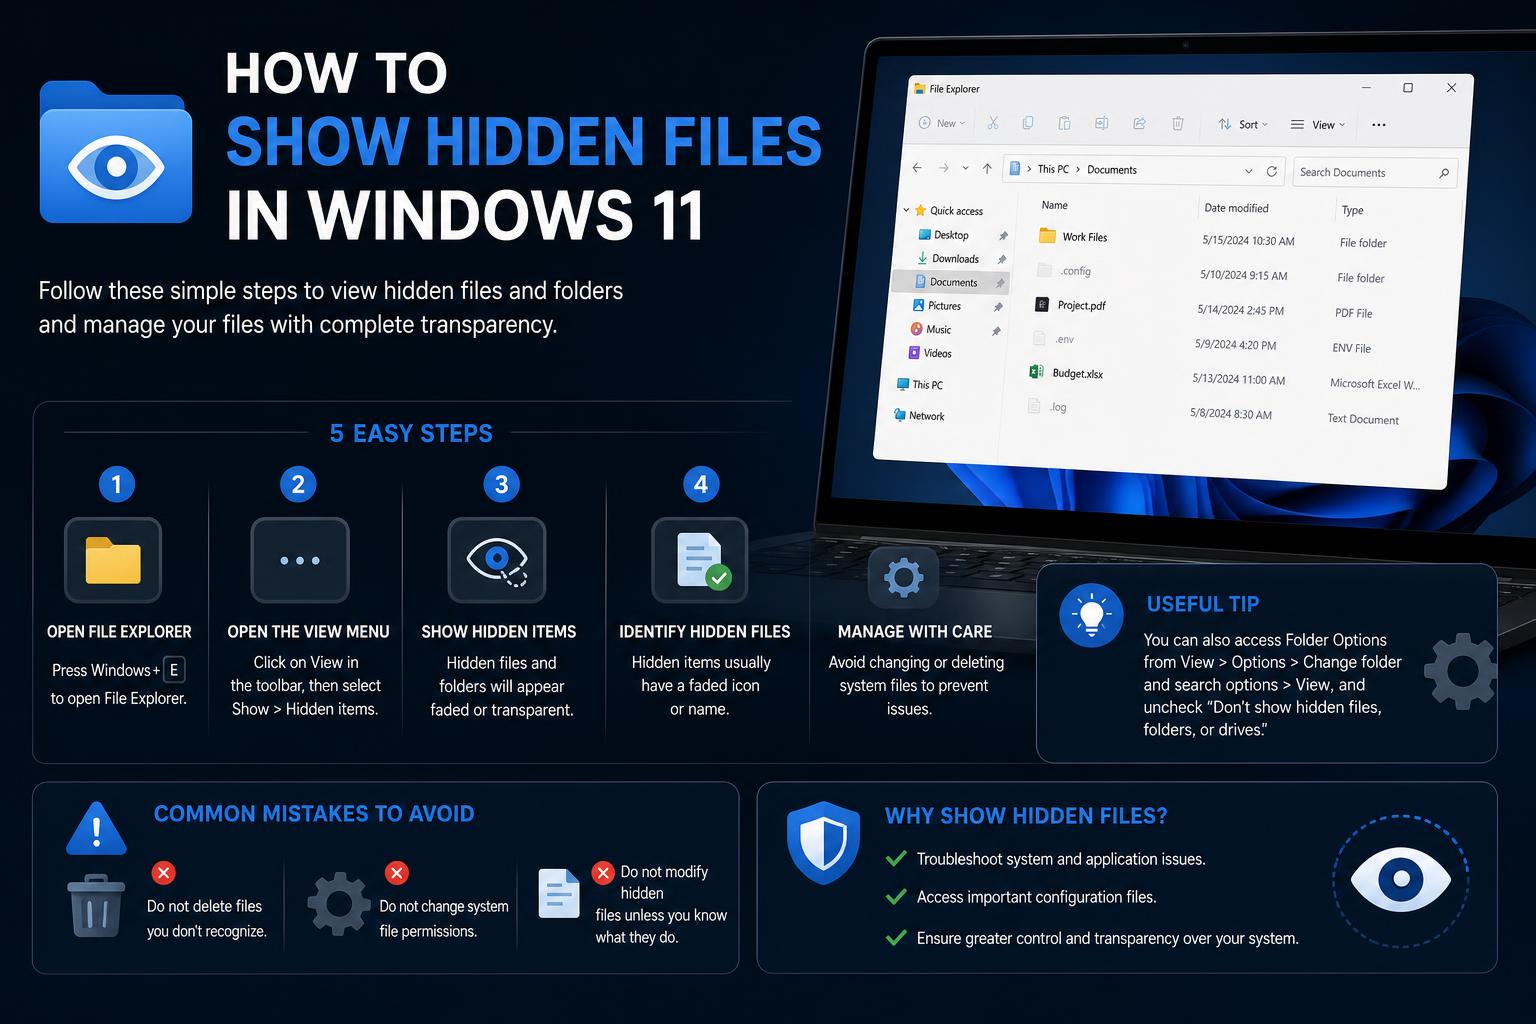
- Regular and system hidden files exist for critical safety and efficiency reasons in Windows 11.
- Multiple approaches exist to reveal hidden items, including GUI and command-line solutions.
- Accessing hidden files can be essential for troubleshooting, app configuration, and security monitoring.
Windows 11 brings a modern, streamlined experience, but for both tech novices and advanced users, how the operating system handles hidden files can be confusing. Many crucial system files, folders, and sometimes even data from applications are purposely hidden from everyday view, as this not only maintains a cleaner workspace but also helps protect important resources from accidental changes or deletion. Yet, there are situations—be it troubleshooting, maximizing storage, or tailoring your workflow—where it’s essential to know exactly where these hidden files reside and how to reveal or manage them safely.
In this guide, you’ll find a complete, up-to-date answer to the question of how to show hidden files and folders in Windows 11. We’ll cover various approaches, including visual methods through File Explorer and Control Panel, as well as command-line tools like PowerShell and Command Prompt. Additionally, you’ll gain a clear understanding of the difference between «regular» and «super hidden» (system-protected) files, why they exist, and how to handle them securely. Let’s dive in and make sense of everything that’s purposely kept out of sight in your Windows setup.
Understanding Hidden Files in Windows 11
Windows 11 hides certain files and folders by default for good reason: many of these are essential to the operating system or specific applications. If visible, they might be deleted or altered accidentally, potentially compromising system stability. It’s important to differentiate between two main categories:
- Regular Hidden Files: These are files and folders flagged with the ‘Hidden’ attribute. They don’t appear in File Explorer unless specific settings are enabled.
- System or ‘Super Hidden’ Files: These files, deeply integrated with the OS, are hidden not just for convenience but for safeguarding. Examples include files in the Windows or System32 directories, often marked both as ‘Hidden’ and ‘System’. Showing these requires explicit confirmation due to the risk of changing or deleting critical system files.
Understanding these categories isn’t just a matter of curiosity. Knowing what’s hidden—and why—will help you navigate your computer with confidence and avoid unnecessary problems.
Why Would You Want to Show Hidden Files?
There are several common scenarios where accessing hidden files in Windows 11 becomes necessary:
- Troubleshooting or cleaning up storage: Hidden folders can accumulate large amounts of data over time. For example, if the properties window for your user folder shows a much larger size than you can account for, the gap often comes from hidden items.
- Recovering or migrating settings: Many applications store configuration or data in hidden folders, like AppData.
- Security and forensics: Sometimes, malware or unwanted programs hide their files and folders to evade detection. Gaining visibility ensures you can track down everything that’s impacting your system.
No matter your skill level, being able to reveal and handle hidden content is a core part of Windows administration and maintenance.
How to Show Regular Hidden Files in Windows 11
Windows 11 provides several methods for revealing hidden files, each with its own pros and cons. The easiest way is through File Explorer’s graphical interface, but the Control Panel and command-line methods offer alternatives, especially for power users or administrators.
Method 1: Using File Explorer
- Open File Explorer: You can do this by clicking the folder icon in the taskbar or using the shortcut Win + E.
- Access the «View» menu: In Windows 11, the menu at the top now has a streamlined ribbon. Click on «View».
- Select «Show» from the dropdown, then «Hidden items»: When checked, all files and folders marked as hidden will now be displayed in their normal locations—but with slightly faded icons.
Method 2: Through Folder Options (Advanced)
- Click the «See more» menu (usually shown as three dots) on the right side of File Explorer’s top bar.
- Select Options at the bottom to open the Folder Options dialog.
- Switch to the View tab.
- In the «Advanced settings» section, look for Hidden files and folders.
- Choose «Show hidden files, folders & drives» to display them or «Don’t show hidden files, folders, or drives» to keep them hidden.
- Click Apply and OK to confirm the changes.
Both these visual approaches make it simple to access hidden files without running any commands—ideal for most users.
How to Reveal System (“Super Hidden”) Files
System files are also hidden by default to prevent unwanted modifications. These are sometimes called ‘super hidden’ files since they require an extra step to display. If you need to alter or inspect them (for diagnostics or advanced troubleshooting), follow these steps:
- Open Control Panel. You can search for it in the Start menu.
- Go to Appearance and Personalization, then File Explorer Options.
- Click the View tab.
- Uncheck the box labeled «Hide protected operating system files (Recommended)».
- You’ll see a warning dialog—read it carefully and click Yes if you understand the risks.
- Click Apply and OK to finish.
Once enabled, you’ll be able to see deeply integrated files crucial for system operation. Take care not to delete or alter these unless you know exactly what you’re doing.
Using the Command Line: PowerShell and Command Prompt
For advanced users, the command line offers precise control over hidden files and folders. This is especially useful when working on headless systems, server environments, or batch troubleshooting.
Viewing Hidden Files with PowerShell
- Open PowerShell as administrator. You can find it through the Start menu, then right-click and select «Run as Administrator».
- Type the following command and hit Enter:
Get-ChildItem -Force
This displays all files—including those marked hidden—in the current directory and subfolders. The -Force switch is the key here.
Using Command Prompt to List Hidden Files
- Launch Command Prompt as administrator.
- Run the following to list hidden files:
dir /a:h - To remove hidden attributes and make files always visible, use:
attrib -h -r -s /s /d C:\*.*
Be cautious when removing hidden or system attributes—these commands can expose files that should remain protected!
Searching for Hidden Files Only in Windows 11
Sometimes, you want to find only hidden items within a folder or directory tree. While File Explorer supports some filtering, you can also use the search bar with specific queries or rely on PowerShell’s capabilities to isolate hidden files quickly. For example, after making hidden items visible, you can search with filters like attributes:=hidden in File Explorer’s search bar.
For more advanced needs—such as locating hidden files related to specific applications (like Minecraft, which keeps settings under %APPDATA%)—open the Run dialog (Win + R), type %APPDATA%, and press Enter to instantly access the usually hidden AppData folder.
Where Do Hidden Files Usually Hide?
Many users discover hidden files when space is unaccounted for. For example, the properties of a user folder might report much more storage used than you can see. The difference is often due to:
- Hidden files and folders (like AppData in user profiles).
- System files and cache data creators by Windows or apps.
- Program-specific directories intended to be unseen (settings, logs, temporary data).
Knowing where these usually reside can make troubleshooting easier. AppData is one prominent example and can be revealed quickly as described above. System folders in C:\Windows or System32 are another, often containing essential but hidden content.
Risks, Security, and Considerations
While hidden files serve legitimate roles, they can also be used by malicious actors to conceal threats. Some malware will deliberately hide its presence through file or folder attributes. For security professionals, detecting and analyzing hidden files is essential for maintaining a secure environment.
Tools like EventLog Analyzer help monitor file integrity on Windows by tracking changes, even in hidden files and folders. Such solutions can alert you whenever file attributes change in suspicious ways, which is crucial for preventing attacks that exploit hidden artifacts. The MITRE ATT&CK framework even catalogs concealment techniques (such as T1564.001 for Hidden Artifacts) used by attackers in the wild.
Always think twice before editing, moving, or deleting files that are hidden by default. Unless you have a backup or know the file’s role, these actions can render applications or even Windows itself unstable.
How to Stop Viewing Hidden Files Again
Once you’re done managing or investigating, it’s good practice to reverse any changes you made to hidden file visibility. Leaving hidden files visible increases the chances of accidental modifications. To restore default behavior:
- In File Explorer’s View menu or the Folder Options dialog, uncheck «Show hidden items».
- If you disabled hiding system files, return to Folder Options and check the box marked «Hide protected operating system files (Recommended)».
- Click Apply and OK.
Common Troubleshooting Questions Relating to Hidden Files
Here are some frequent issues users face, with solutions and tips:
- My folder is taking up more space than its visible contents account for: Properties include hidden files and folders, so to get an accurate picture, enable hidden file viewing as detailed earlier.
- Why can’t I access or delete certain hidden folders? Some files are both hidden and system-protected. Even with visibility settings changed, permissions or Windows Defender may restrict you. Consider your needs carefully before attempting to override these protections.
- I made system files visible and now I’m seeing new files everywhere. Is this bad? Not at all—these are normally hidden for your safety. You can hide them again using Folder Options as above.
- Are there command-line scripts to automate revealing or hiding files? Yes. PowerShell or batch scripts using attrib or Get-ChildItem -Force offer flexible automation for advanced users and system administrators.
Maintaining Security When Working with Hidden Files
System stability and security go hand in hand with prudent hidden file management. If you’re performing investigations for security, consider using dedicated monitoring solutions ( and similar offer comprehensive oversight) to track any changes to sensitive files and folders.
Be alert for hidden files appearing unexpectedly or in locations they shouldn’t be: these might signal malware or misconfigured software. Always conduct a scan with your antivirus or endpoint security solution if you notice anything suspicious.
Best Practices
Windows 11 makes it straightforward to display hidden files when necessary—whether for basic troubleshooting, advanced maintenance, or forensic inspection. The visual options in File Explorer and Control Panel provide one-click control, ideal for most users. For those comfortable with scripting or working beyond the GUI, PowerShell and Command Prompt grant even deeper oversight.
Remember to reverse visibility changes once finished, and never modify system files unless you fully understand their role. Use monitoring tools to ensure sensitive locations aren’t altered without your knowledge. By following these steps, you can safely explore and control even the most hidden corners of your Windows 11 system.