
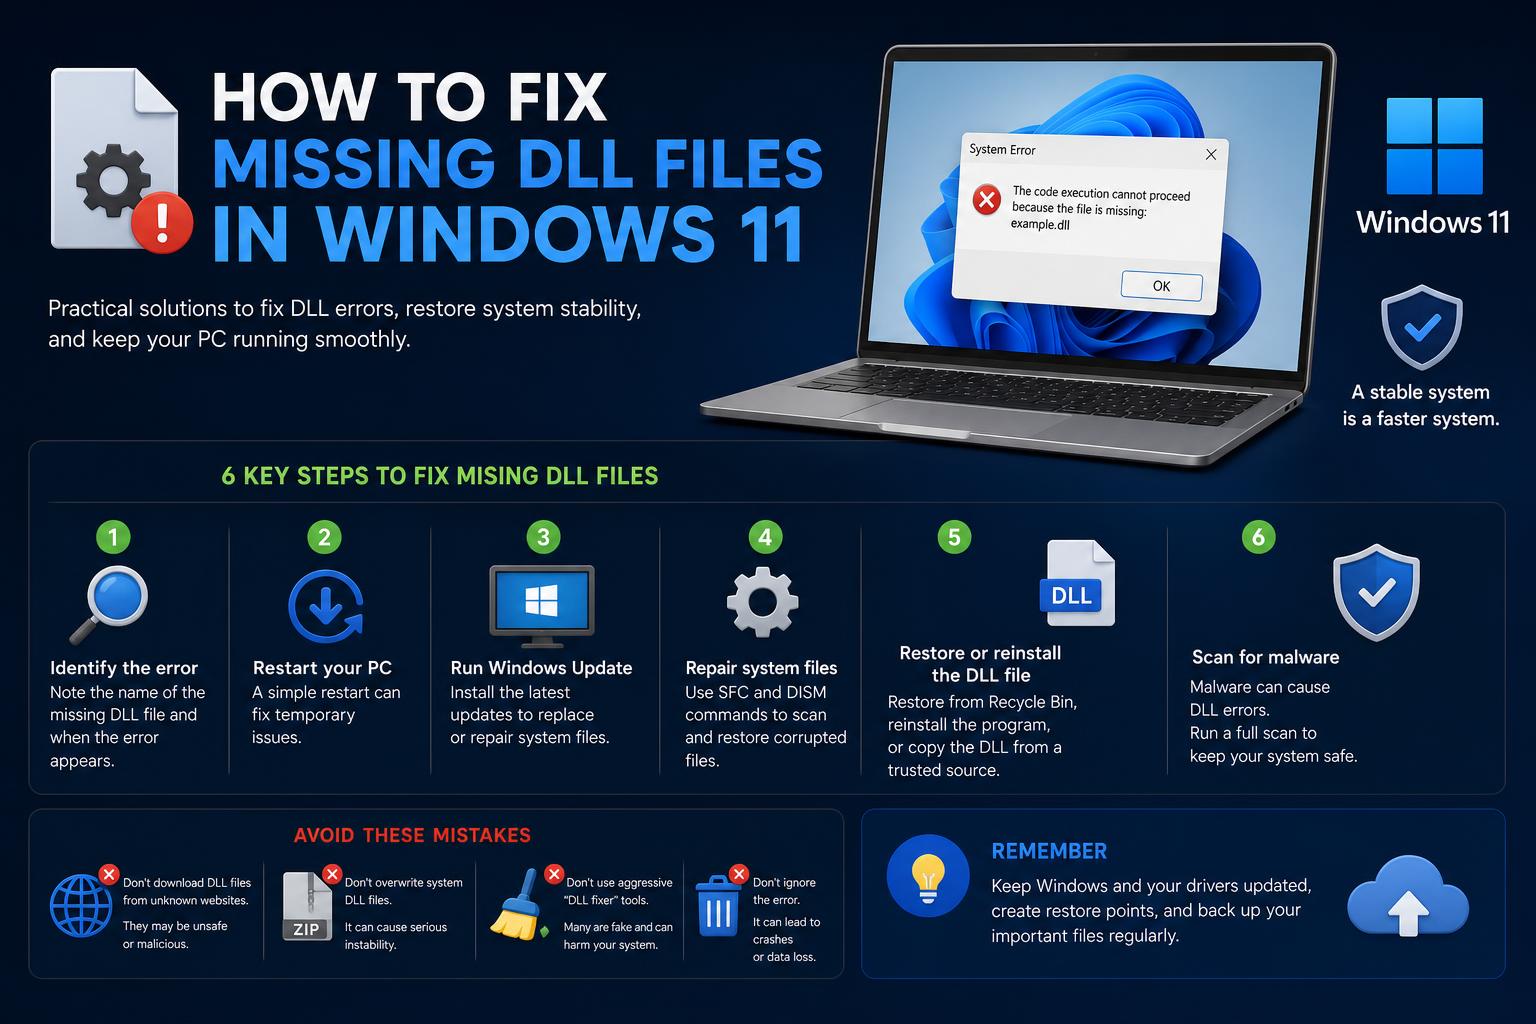
- Most missing DLL errors in Windows 11 stem from absent Visual C++ Redistributables.
- Never download DLL files from third-party websites; always use official Microsoft sources for safety.
- Tools like System File Checker and DISM offer effective repair options but should be used methodically.
There’s nothing quite as frustrating as firing up your favorite app on Windows 11, only to be greeted by a cryptic error about a missing .dll file. You might be ready to get to work or game, but instead you’re left scratching your head, staring at scary-sounding file names that mean nothing to most people. If it makes you feel any better, you’re not alone—DLL errors are among the most common headaches for Windows users, across all skill levels.
But here’s the thing: Missing DLL files are rarely a sign of catastrophic failure, and they’re almost always fixable with some straightforward steps. Whether you’re troubleshooting after a major Windows update, dealing with apps like Adobe, Steam, or LibreOffice refusing to start, or you just want to know the safest and most reliable ways to fix these errors, this guide pulls together all the trusted methods, safety tips, and in-depth insight straight from real-world experience and Microsoft’s own advice. Let’s break down what you need to know and what actually works.
What Are DLL Files and Why Are They Important?
DLL stands for Dynamic Link Library. Think of DLL files as shared building blocks or ingredients that multiple programs use to perform certain functions. This sharing system helps keep your computer streamlined and efficient—rather than each program containing its own complete set of tools, they reference these shared libraries to save space and allow for easier updates. When Windows or an app can’t locate a particular DLL, that’s when you see the error.
Common error messages:
- “The program can’t start because MSVCP140.dll is missing from your computer.”
- “VCRUNTIME140.dll was not found.”
- “Error loading filename.dll. The specified module could not be found.”
- “Failed to load steamui.dll.”
Whether it’s MSVCR120.dll, VCRUNTIME140.dll, d3dx9_43.dll, or MFReadWrite.dll causing drama, the problem is always the same: Windows can’t find a shared ingredient it needs to run a program. So, how do these files go missing to begin with?
Why Do DLLs Go Missing or Fail to Load?
There are several root causes, and understanding the why will help you avoid risky ‘quick fixes’ that tend to do more harm than good:
- Missing or Corrupted Visual C++ Redistributables: This is hands down the most common culprit. Many popular apps and games require these Microsoft components, but not all software installs them automatically, or updates may break them. Windows is very picky about having the right version (sometimes both 32-bit and 64-bit) of these redistributables.
- Program Installation or Removal Problems: Uninstalling or updating software can sometimes delete DLLs that are still needed by other programs. Likewise, incomplete installations can leave you without critical files.
- Failed or Incomplete Windows Updates: Sometimes a Windows update will update or remove DLLs, or installation errors will leave your system with corrupt or missing files.
- Malware Attacks: Malicious software can delete, corrupt, or even hijack DLL files as an attack tactic.
- Hardware Failure or Bad Sectors: If your hard drive or memory is failing, or you’ve experienced an unexpected shutdown or power surge, Windows files—DLLs included—can get damaged or disappear.
- Overactive Antivirus Software: Occasionally, security software may mistake changes to DLLs as threats and quarantine them.
- Windows Registry Issues: The Registry acts as a roadmap for the operating system. If it gets corrupted or tampered with, Windows might be unable to locate certain DLLs, even if those files still exist.
- Incorrect Permissions or User Rights: Lack of admin rights can prevent some DLLs from being accessed.
Almost every scenario boils down to Windows not being able to find, access, or verify a required DLL. So, the fix depends on whether the missing DLL belongs to Windows itself, a software package, or an external program.
What NOT to Do: Avoid Dangerous Fixes
This can’t be stressed enough—never download individual DLL files from unofficial websites like dll-files.com or similar. These sites prey on desperate users, offering ‘quick fixes’ that often bundle malware, outdated files, or mismatched 32/64-bit versions that can make things worse.
- High risk of malware and security breaches.
- The DLL version could be incorrect for your system.
- Copyright and licensing can become serious legal issues.
Copying DLLs from another computer is just as risky—even if it’s safe from malware, the Windows version or software context could be different and cause more problems later. And never go around deleting DLL files in hopes of fixing things—missing shared libraries can destabilize your entire operating system or break other apps.
Real-World Experiences: How Users Struggle with DLL Issues
Many users, according to real-life support forum threads and community questions, experience DLL errors after upgrading to Windows 11, attempting to open Office programs, Adobe Suite, Steam, or certain games. For example, errors citing missing MFReadWrite.dll, MFPlat.dll, MFPlay.dll prevent LibreOffice from working, and missing d3dx10_43.dll halts games. Despite attempts like system repairs, driver updates, or even using ISO files to repair Windows, these DLL puzzles persist. Some resort to ‘DLL fixer’ tools, but these rarely provide a reliable solution and can even result in hundreds of DLLs showing as missing—often incorrectly.
First Steps: Prepare Your System for Clean Troubleshooting
Before diving into fixes, it’s smart to prepare your PC and rule out the most basic issues:
- Scan for malware. Run Windows Defender or a reputable third-party antivirus for a full scan, not just a quick check. Malware can hide or corrupt DLLs as part of its attack.
- Update Windows to the latest version. Use search to find ‘Check for Updates’, install all available updates, and reboot. Sometimes fixing update glitches alone will solve missing DLL errors.
- Check your hardware if you suspect issues. Components like memory or hard drives can go bad. If you recently installed new RAM or storage, make sure all connections are snug, and consider running a RAM test (MemTest86) or a hard drive check with built-in tools.
- Make sure you’re running programs as administrator. Certain DLL files require admin rights. Right-click your app, select ‘Run as Administrator’, and see if the issue persists.
- Check your recycle bin. Occasionally, DLLs are accidentally deleted, so search the bin for the file and restore it if found.
Safe and Proven Methods to Fix Missing DLL Errors on Windows 11
Let’s get to the fixes—these methods are recommended both by technical support experts and Microsoft itself. Work through them in order, and you’ll significantly increase your chance of success while keeping your system safe:
1. Install All Microsoft Visual C++ Redistributables
Why this works: The majority of missing DLL errors involve redistributables needed by a variety of software, especially if you see references to MSVCR, MSVCP, or VCRUNTIME in the error message. Each program may need a different version, and both 32- and 64-bit versions are sometimes required even on modern systems.
- Open your browser and search for ‘Microsoft Visual C++ Redistributables download’ (always choose links to Microsoft.com).
- Grab all available versions: 2005, 2008, 2010, 2012, 2013, and especially 2015-2022. Download both x86 (32-bit) and x64 (64-bit) installers—it’s quick, safe, and futureproofs your system.
- Run each installer, following the instructions until every package is done.
- Restart your computer to finish installation.
Tip: This step alone resolves roughly 70-80% of all DLL problems, and can stop similar errors before they even start appearing in future projects.
2. Reinstall (or Repair) the Program Having Issues
When the error pops up for one program but not others, the issue is likely with that specific program.
- Uninstall the problematic program using Windows Settings > Apps > Installed Apps.
- Restart your PC to flush out leftover components.
- Download the latest version of the program from its official website or Microsoft Store (never third-party download sites).
- Install afresh, then test to see if the error is gone.
Why this works: Many program installers include or repair their own needed .dll files. A clean install resets their state and resolves corrupted or absent modules.
3. Run Windows Update
Sometimes, all it takes is ensuring you have Windows fully updated to replace outdated or lost system DLL files.
- Go to Settings > Windows Update > Check for updates.
- Install any pending updates, restart your computer, and retest the troublesome application.
This can bring back or refresh core DLL files required by system functions or major Microsoft products.
4. System File Checker (SFC) and DISM: Repair Corrupted System Files
For persistent errors that don’t resolve with the above, it’s time to use built-in Windows repair tools:
System File Checker (SFC):
- Open Start, type cmd, right-click Command Prompt and run as Administrator.
- Type
sfc /scannowand hit Enter. - Let it run (it may take 15-30 minutes). Don’t close the window, even if it seems stuck at certain percent values.
- At the end, review the results:
- “Windows Resource Protection did not find any integrity violations”: Your system DLLs are healthy. The issue may be program-specific.
- “Windows Resource Protection found corrupt files and successfully repaired them”: Restart and retry your program.
- “…but was unable to fix some…”: Proceed to the next step (DISM).
DISM (Deployment Imaging Service and Management):
- Still in Command Prompt as admin, type
DISM /Online /Cleanup-Image /Restorehealthand press Enter. - This scans your system image and repairs issues SFC could not.
- After completion, reboot and rerun
sfc /scannowfor a finishing sweep.
Note: Both tools are official and safe; they target core Windows files, leaving user data and third-party apps untouched.
5. Install DirectX End-User Runtime for Gaming Errors
If you run into DLL errors mentioning d3dx9, d3dx10, d3dx11, or xinput files—typically when launching games—you need DirectX legacy components:
- Search ‘DirectX End-User Runtime download’ and be sure to select the Microsoft June 2010 package from Microsoft’s official site.
- Install the package, reboot, and then start your game again.
- For modern games, also make sure your graphics drivers (NVIDIA, AMD, Intel) are fully updated from their official sites.
Windows 11 supports modern DirectX, but many classic games still need these extra files.
6. Manual Replacement (Only as Last Resort!)
If after all safe techniques, a specific DLL file continues to be stubbornly absent, you may have to replace it manually. Here’s the safe process:
- Look up where the app expects the DLL (the error message usually mentions the path).
- Check C:\Windows, System32, or SysWOW64, depending on your version.
- Download DLLs only from the official app or Microsoft sources. If you must resort to a download, be certain it comes from a trusted vendor—beware of scam sites.
- Copy the new DLL into the appropriate folder, then register it using Command Prompt as Administrator:
regsvr32 C:\Windows\System32\filename.dll
This is risky and should only be attempted if all other options fail.
Bonus: Extra Tools & Advanced Fixes for Stubborn DLL Issues
Attempt a Framework Repair
For errors involving .NET or system frameworks, use the official Microsoft .NET Framework Repair Tool. This can resolve registration or corruption issues specific to common developer dependencies.
Re-register All System DLLs
Advanced users facing persistent issues can try re-registering all DLLs in the System32 directory (as suggested in some support scenarios):
for %1 in (%windir%\System32\*.dll) do regsvr32.exe /s %1
Only do this after backing up important data—it’s a global change. If unsuccessful, an in-place Windows upgrade (with files and apps preserved) may be required.
When All Else Fails: Consider a Windows Reset
If every repair, reinstallation, and scan fails, Windows includes a built-in reset option that lets you keep your files while reinstalling the operating system.
- Open Settings
- Head to ‘Update & Security’ > ‘Recovery’
- Select ‘Reset this PC’ -> ‘Keep My Files’
- Follow on-screen instructions and let the process finish
Remember to back up important files just in case. After a reset, you’ll need to reinstall applications, but core issues with system DLLs are usually resolved.
Frequently Asked Questions About DLL Errors in Windows 11
Is it safe to download missing DLL files online?
Absolutely not. Reliable fixes use official software packages or Microsoft’s own tools. Downloading DLLs from random sites is a major security risk.
Why am I getting DLL errors right after installing a program?
Apps often rely on external libraries that aren’t always bundled in the installer. That’s why Visual C++ Redistributables must usually be installed manually.
Can malware cause DLL errors?
Yes. Malware often deletes or hijacks critical DLL files as part of its action. Run a full antivirus scan if you suspect infection.
Do I need to install both x86 and x64 Redistributables?
Yes! Even on a 64-bit OS, many apps are 32-bit and require those versions of libraries too.
Will System Restore fix DLL errors?
It can help, if there’s a recent restore point from before the problems started. It won’t always repair all lost or corrupted files, but it’s worth a try if available.
Should I use a ‘DLL fixer’ program?
Exercise caution—many so-called ‘DLL fixer’ tools are unreliable or even harmful, flagging nonexistent issues or causing instability. Stick to official tools unless you are very confident in the software.
How to Prevent Future DLL Headaches
- Keep Windows and all apps updated. Always install updates as they are released.
- Install all suggested Visual C++ Redistributables as a matter of habit after major Windows or app upgrades.
- Regularly create restore points or system backups.
- Only download software from official sources.
- Use trustworthy antivirus software to avoid malware-related file loss.
Although DLL errors on Windows 11 can seem intimidating, once you follow the correct steps and avoid risky sites, you will be able to restore your system quickly. Remaining cautious and proactive is the key to preventing future issues with missing or corrupt DLL files.